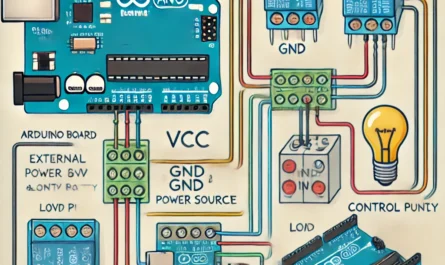
Here are some common methods:
1. Using delay() (The Basic Method)
✅ Pros:
- Simple and easy to understand.
- Good for beginners.
❌ Cons:
- Blocks execution – while
delay()is running, nothing else can happen. - Not suitable for multitasking.
📌 Example Code
void setup() {
    pinMode(13, OUTPUT);
}

void loop() {
    digitalWrite(13, HIGH); // Turn LED on
    delay(500);             // Wait 500 milliseconds
    digitalWrite(13, LOW);  // Turn LED off
    delay(500);             // Wait 500 milliseconds
}
🛠 Use Case:
- Good for simple projects where you don’t need multitasking.
2. Using millis() (Non-blocking Blinking)
This method allows the Arduino to do other tasks while the LED blinks.
✅ Pros:
- Non-blocking – other code can run in parallel.
- Good for multitasking in more complex projects.
❌ Cons:
- More complex than using
delay().
📌 Example Code
unsigned long previousMillis = 0;
const long interval = 500;  // Interval in milliseconds

void setup() {
    pinMode(13, OUTPUT);
}

void loop() {
    if (millis() - previousMillis >= interval) {
        previousMillis = millis(); // Update the last time the LED toggled
        digitalWrite(13, !digitalRead(13)); // Toggle LED state
    }
}
🛠 Use Case:
- Great for projects where multiple tasks must run simultaneously, like sensor reading, motor control, or communication.
3. Using micros() (High-Precision Timing)
Instead of millis(), this uses microseconds (1,000,000 per second) for more precise control.
✅ Pros:
- More precise than
millis()(microsecond-level accuracy).
❌ Cons:
- Still relies on polling (similar to
millis()).
📌 Example Code
unsigned long previousMicros = 0;
const long interval = 500000; // 500,000 µs = 500 ms

void setup() {
    pinMode(13, OUTPUT);
}

void loop() {
    if (micros() - previousMicros >= interval) {
        previousMicros = micros();
        digitalWrite(13, !digitalRead(13));
    }
}
🛠 Use Case:
- Suitable for precise timing applications, such as PWM control, high-speed sensors, or signal processing.
4. Using a Timer Interrupt (Precise and Efficient)
With hardware timers, the Arduino automatically blinks the LED without using loop().
✅ Pros:
- Very precise (hardware-controlled timing).
- Does not block execution.
❌ Cons:
- Requires knowledge of Arduino timers.
- Different Arduino models have different timer configurations.
📌 Example Code (Using TimerOne Library)
#include <TimerOne.h>

void blink() {
    digitalWrite(13, !digitalRead(13)); // Toggle LED
}

void setup() {
    pinMode(13, OUTPUT);
    Timer1.initialize(500000); // Set timer to 500ms (500,000 µs)
    Timer1.attachInterrupt(blink); // Call the blink function
}

void loop() {
    // The LED blinks automatically using the timer
}
🛠 Use Case:
- Precise timing applications, such as frequency generators, audio processing, and advanced robotics.
5. Using PWM (Fast Blinking & Dimming)
Instead of turning the LED fully ON or OFF, we can use Pulse Width Modulation (PWM) to control brightness.
✅ Pros:
- Can create smooth fading effects.
- Works well for LED dimming.
❌ Cons:
- Only works on PWM pins (marked with
~on Arduino). - Not good for precise timing applications.
📌 Example Code
void setup() {
    pinMode(9, OUTPUT); // Use a PWM-capable pin (e.g., 9)
}

void loop() {
    for (int i = 0; i <= 255; i++) {  // Gradually increase brightness
        analogWrite(9, i);
        delay(10);
    }
    for (int i = 255; i >= 0; i--) {  // Gradually decrease brightness
        analogWrite(9, i);
        delay(10);
    }
}
🛠 Use Case:
- Used for LED brightness control, motor speed control, and audio signal processing.
6. Using an External Circuit (555 Timer)
Instead of using an Arduino, a 555 timer IC can blink an LED independently.
✅ Pros:
- No Arduino needed.
- Saves Arduino resources.
❌ Cons:
- Less flexible (fixed blinking speed unless using a variable resistor).
📌 Basic 555 Timer Circuit
- Components Needed: 555 Timer, Resistors, Capacitor, LED.
- Operation: The 555 timer oscillates, turning the LED on and off.
🛠 Use Case:
- When Arduino is unavailable, or for standalone LED circuits.
7. Using FreeRTOS (Multitasking)
With FreeRTOS, multiple tasks (like blinking and sensor reading) can run in parallel.
✅ Pros:
- True multitasking.
- Efficient for complex systems.
❌ Cons:
- More advanced (requires FreeRTOS knowledge).
- Not all Arduino boards support real-time operating systems.
📌 Example Code (Using FreeRTOS)
#include <Arduino_FreeRTOS.h>

void blinkTask(void *pvParameters) {
    pinMode(13, OUTPUT);
    while (1) {
        digitalWrite(13, HIGH);
        vTaskDelay(500 / portTICK_PERIOD_MS);
        digitalWrite(13, LOW);
        vTaskDelay(500 / portTICK_PERIOD_MS);
    }
}

void setup() {
    xTaskCreate(blinkTask, "Blink", 128, NULL, 1, NULL);
}

void loop() {
    // RTOS handles tasks
}
🛠 Use Case:
- Advanced projects with multiple tasks, like robotics, drones, and automation.
8. Using a State Machine (For Complex Patterns)
Instead of a simple blink, a state machine can create custom LED blinking patterns.
✅ Pros:
- Allows custom blinking sequences.
- Great for LED animations.
❌ Cons:
- More complex than a simple loop.
📌 Example Code
enum LEDState { ON, OFF };
LEDState state = OFF;
unsigned long lastTime = 0;

void setup() {
    pinMode(13, OUTPUT);
}

void loop() {
    unsigned long currentTime = millis();

    switch (state) {
        case OFF:
            if (currentTime - lastTime >= 500) {
                lastTime = currentTime;
                digitalWrite(13, HIGH);
                state = ON;
            }
            break;

        case ON:
            if (currentTime - lastTime >= 200) {
                lastTime = currentTime;
                digitalWrite(13, LOW);
                state = OFF;
            }
            break;
    }
}
🛠 Use Case:
- Custom LED effects (e.g., Morse code, special flashing sequences).
Final Thoughts
- For simple blinking →
delay() - For multitasking →
millis() - For precision →
micros()or Timer Interrupts - For PWM effects →
analogWrite() - For automation → FreeRTOS or State Machine


