SN74HC164: Hide an LED’s Intermediate States While the Register Shifts
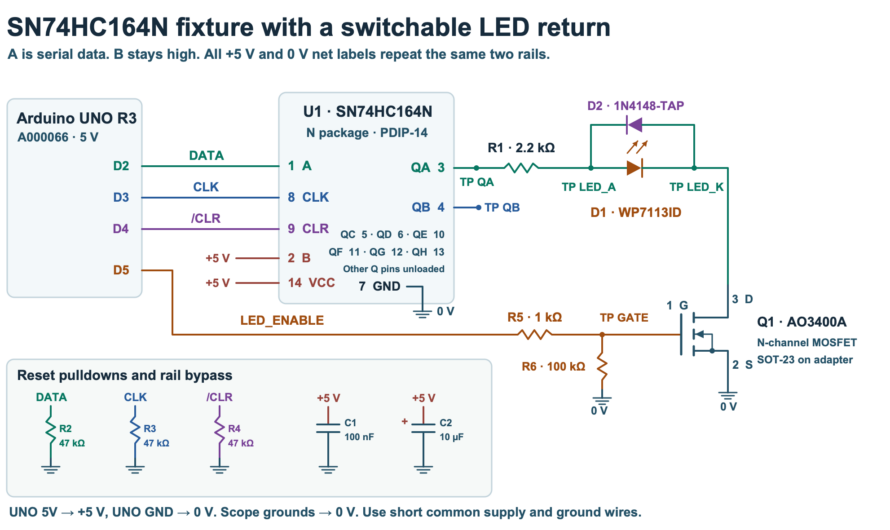
Clock the same eight bits through a SN74HC164N twice. Keep the LED dark during one transfer while the register outputs still change.
Unravel the Mystery of Electronics
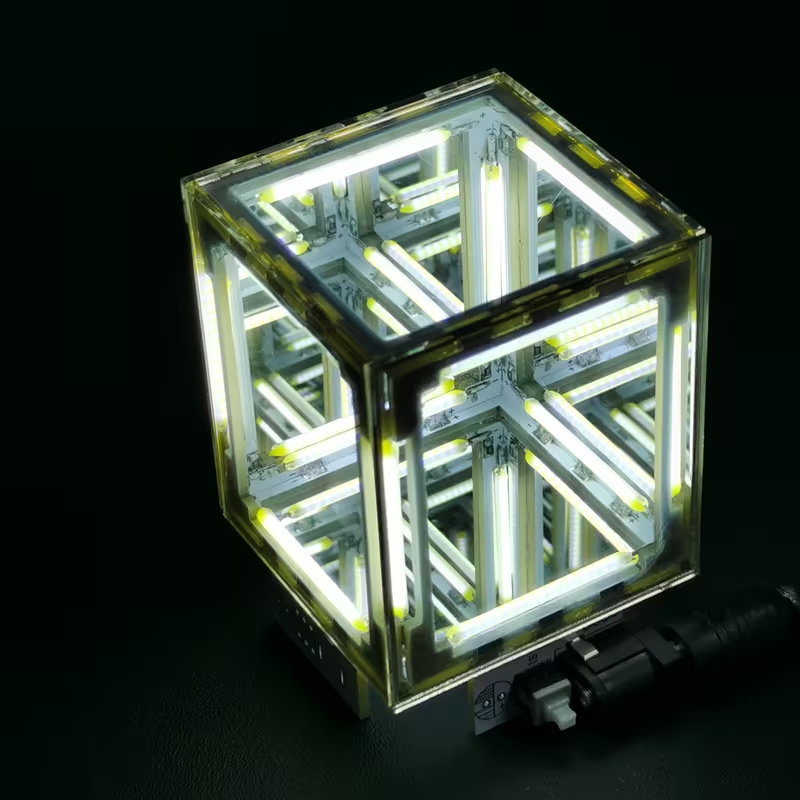
Listing specifies 5-volt direct current. Soldering required; battery and glue not included.
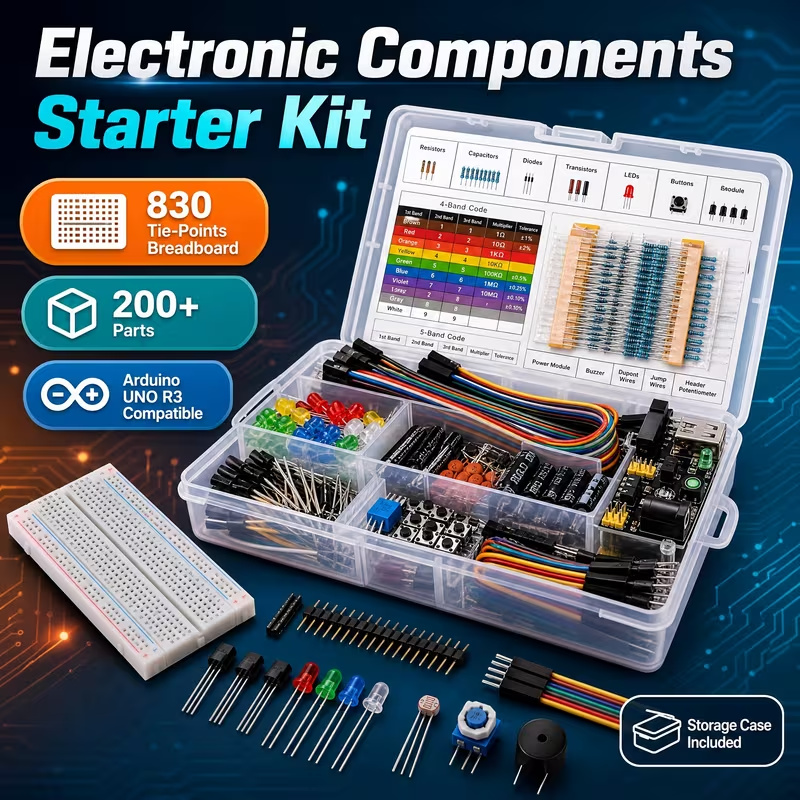
Breadboard, wires and assorted parts. Arduino controller board not included.
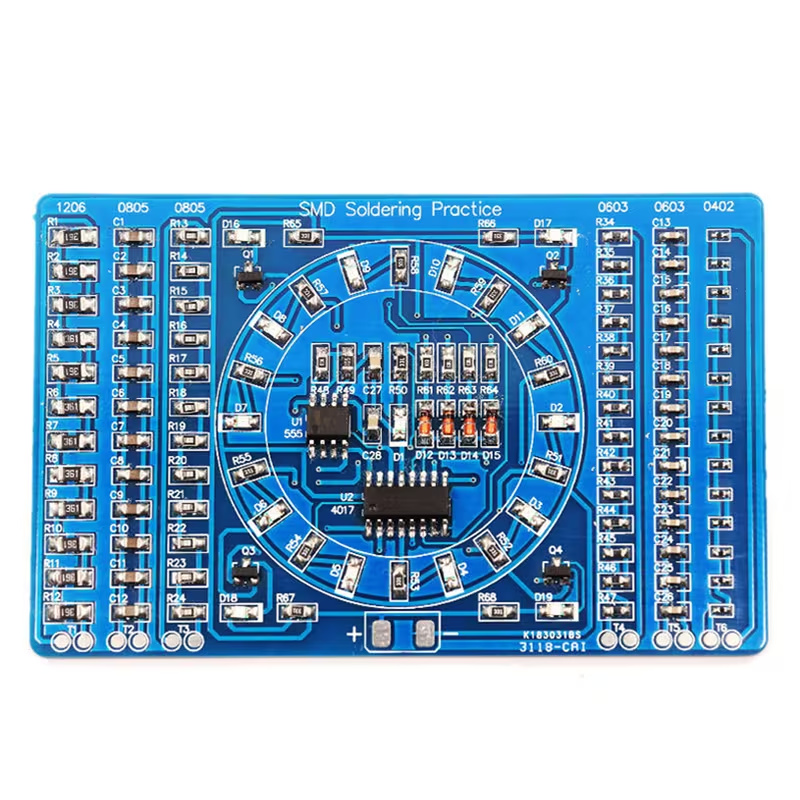
Surface-mount soldering practice. Battery and battery holder not included.
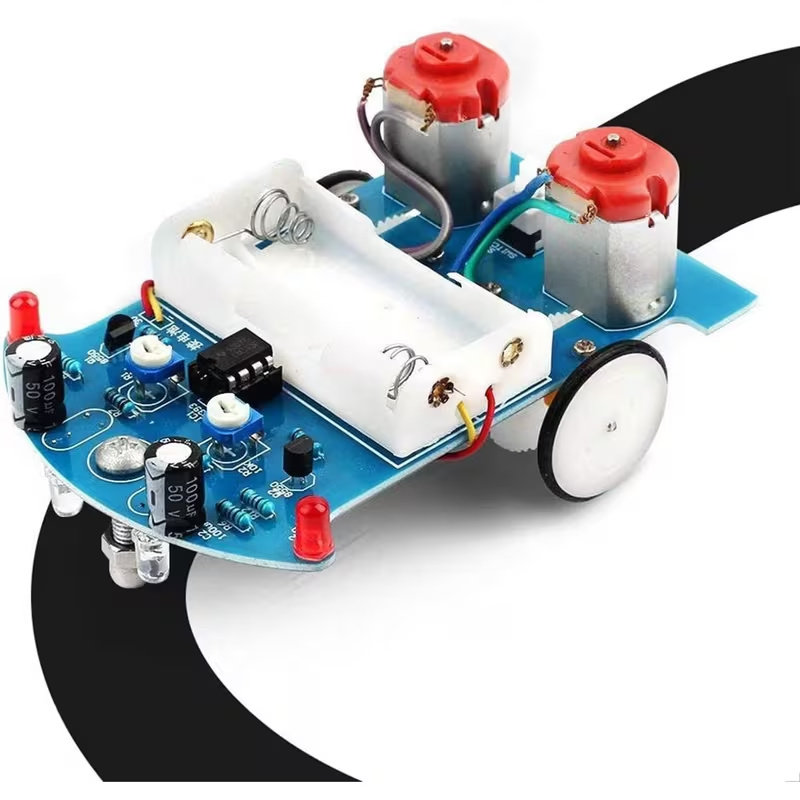
Soldering and assembly required. Check battery and track requirements before buying.
Tricky Circuit may earn a commission through these links. Product ideas have not been bench-tested by Tricky Circuit and are not verified lesson parts lists.
Arduino is an open-source electronics platform based on easy-to-use hardware and software. Arduino boards are able to read inputs—light on a sensor, a finger on a button, or a Twitter message—and turn it into an output—activating a motor, turning on an LED, publishing something online. You can tell your board what to do by sending a set of instructions to the microcontroller on the board. To do so you use the Arduino programming language (based on Wiring), and the Arduino Software (IDE), based on Processing.
Clock the same eight bits through a SN74HC164N twice. Keep the LED dark during one transfer while the register outputs still change.
Use two SN74HC125 buffers and an Arduino UNO to compare a guarded handoff with a resistor-limited overlap. Measure both enable edges and the shared node.
Swap two MCP4922 voltages with an Arduino UNO. Compare the intermediate state after separate SPI updates with a shared LDAC pulse.
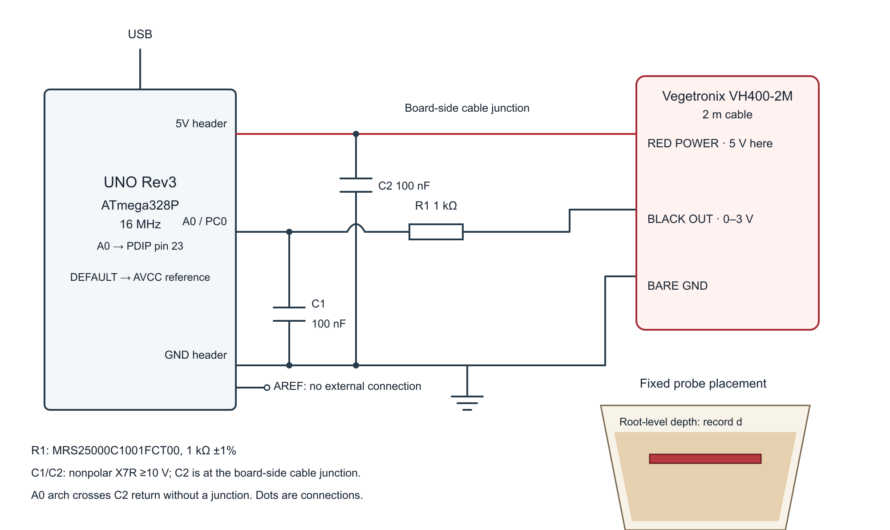
Log a VH400-2M with an original UNO, mark watering and gaps, and fit voltage trends only within qualified intervals using actual elapsed timestamps.
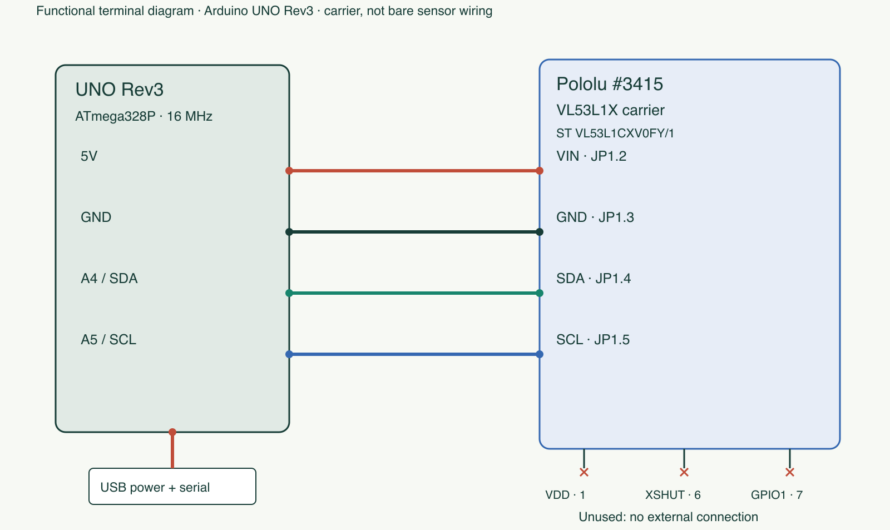
Compare centered VL53L1X regions on an UNO, require new-result evidence, and withhold failed ranges instead of mistaking a narrower view for accuracy.
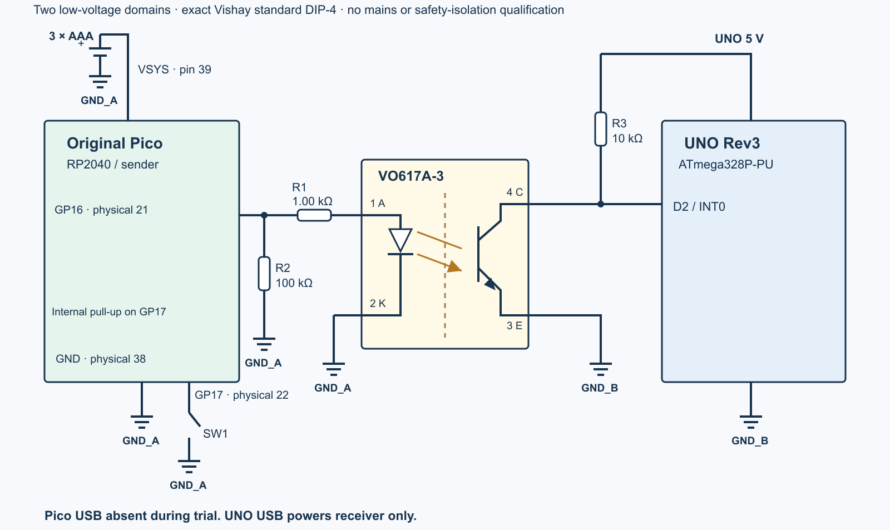
Build a low-voltage VO617A pulse link, measure LED current and logic levels, then compare sixteen Pico commands with UNO edge counts and pulse widths.
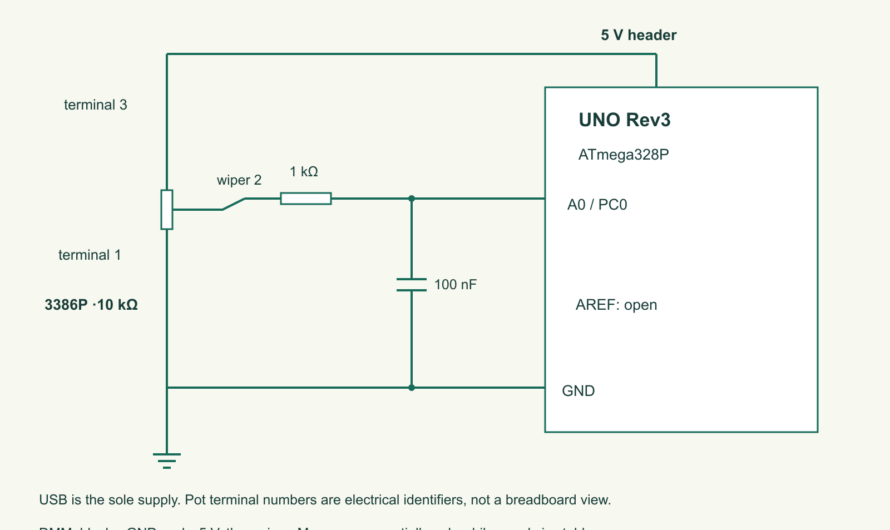
Wire a ratiometric UNO knob, inspect its ADC code bin and compare it with a manually measured supply. A constant position can keep the same code while its voltage changes.
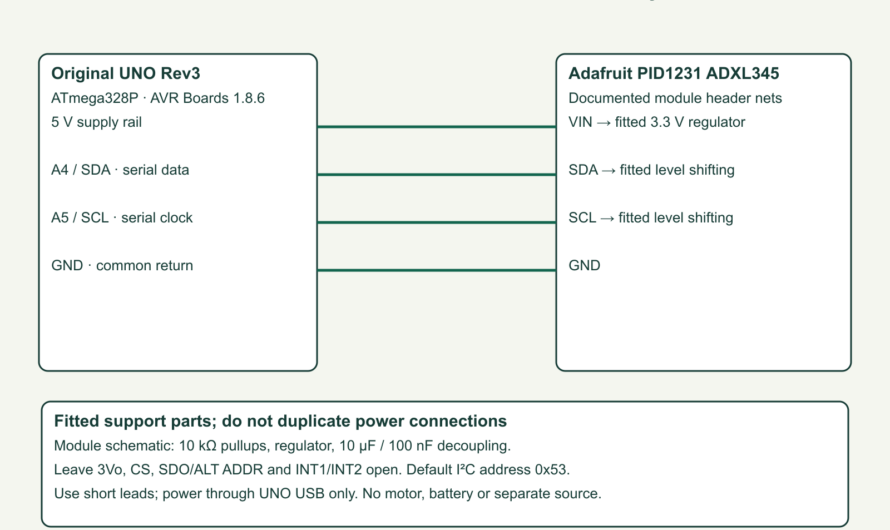
Build an ADXL345 gravity lab with complete raw-register UNO code. Check buffered vectors, units, overrun and motion before treating an angle as static inclination.
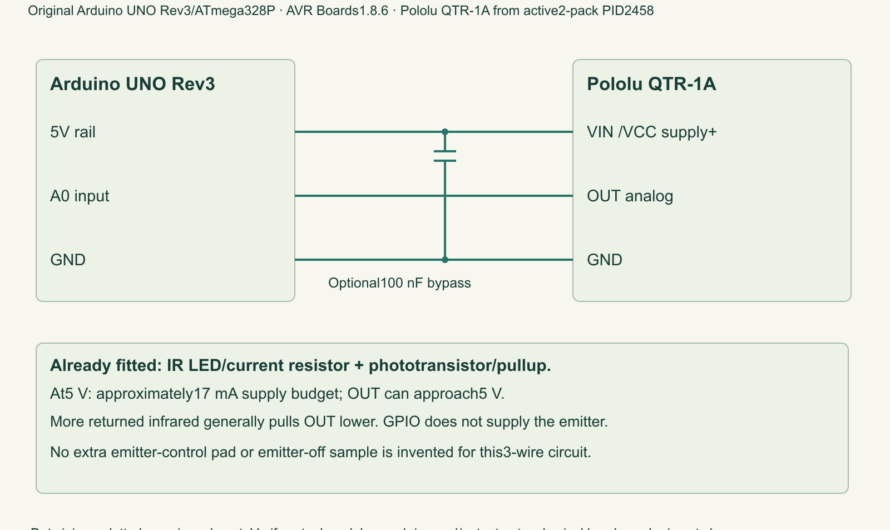
Test QTR-1A materials at3–6mm with full UNO code. Compare complete sample windows, reject weak calibration and bracket each reading with a reference before assigning a label.
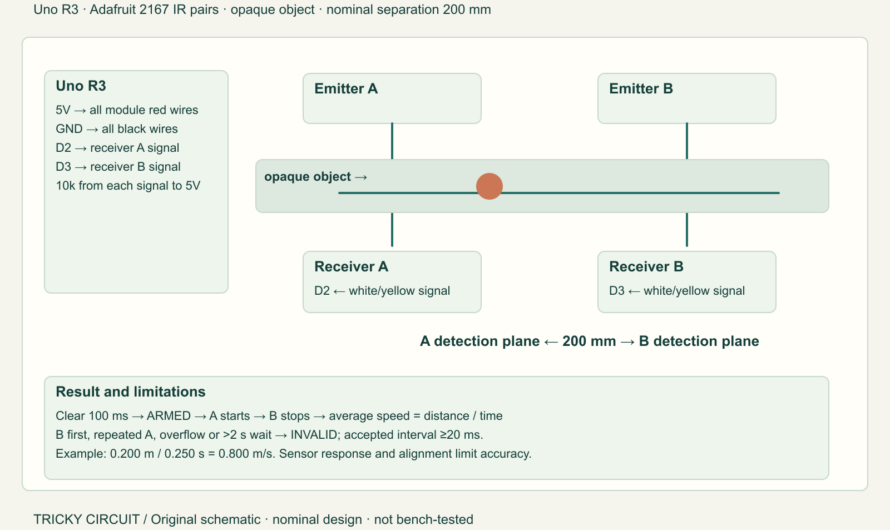
Time an opaque ball between two optical gates on an Uno. Check event order, reject incomplete runs and calculate average speed with spacing and sensor-delay uncertainty.
Explore these do-it-yourself project kits. Check the selected option, included parts and instructions on each offer.
Tricky Circuit may earn a commission if you buy through these Temu affiliate links. These are product ideas; they have not been bench-tested by Tricky Circuit and are not verified lesson parts lists.
Supplier product photo
Listing specifies 5-volt direct current. Soldering required; battery and glue not included.
Supplier product photo
Breadboard, wires and assorted parts. Arduino controller board not included.
Supplier product photo
Surface-mount soldering practice. Battery and battery holder not included.
Supplier product photo
Soldering and assembly required. Check battery and track requirements before buying.