Use Peak Detect to Find the Pulse a Coarse Scope Trace Can Miss
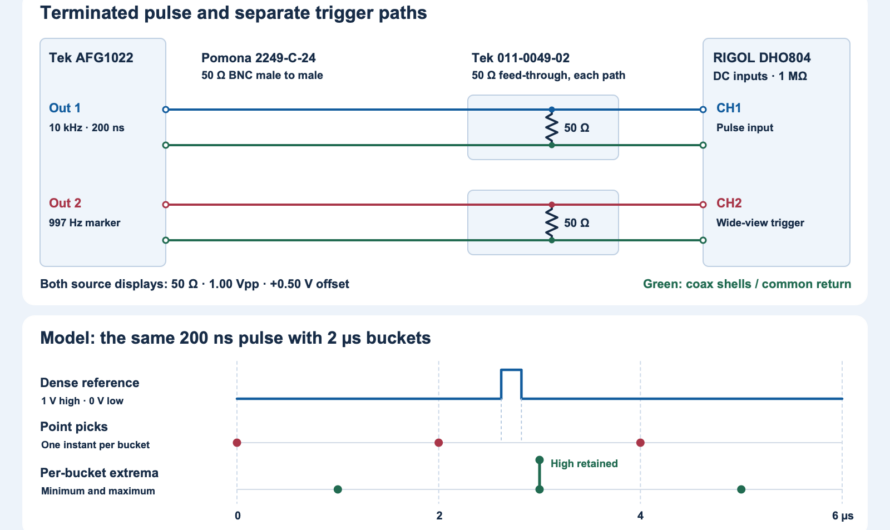
Verify a 200 ns pulse using a dense capture, compare Normal and Peak acquisitions in the same overview, then model point picks and extrema.
Unravel the Mystery of Electronics
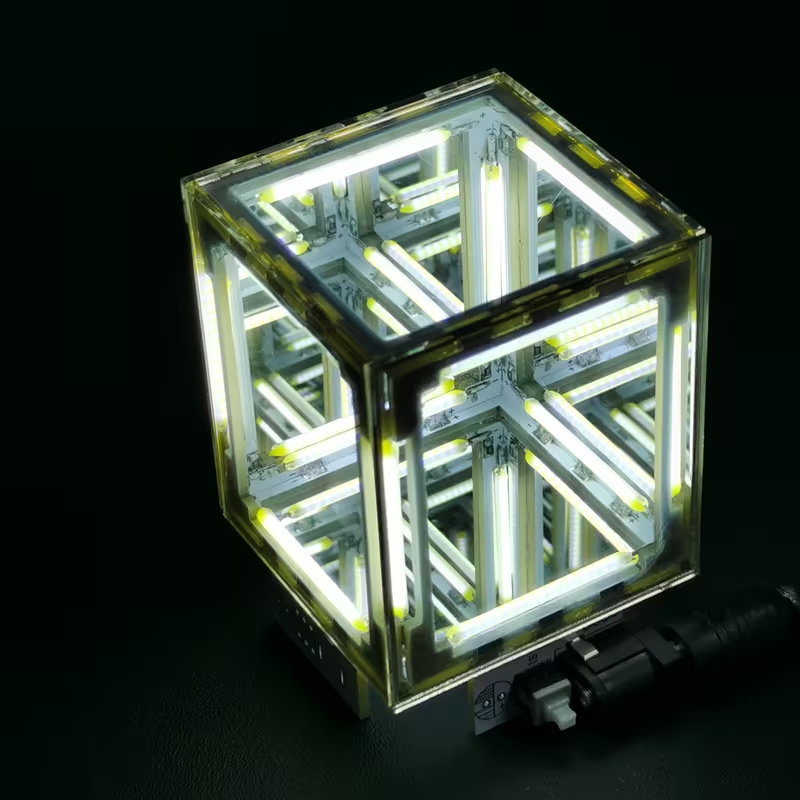
Listing specifies 5-volt direct current. Soldering required; battery and glue not included.
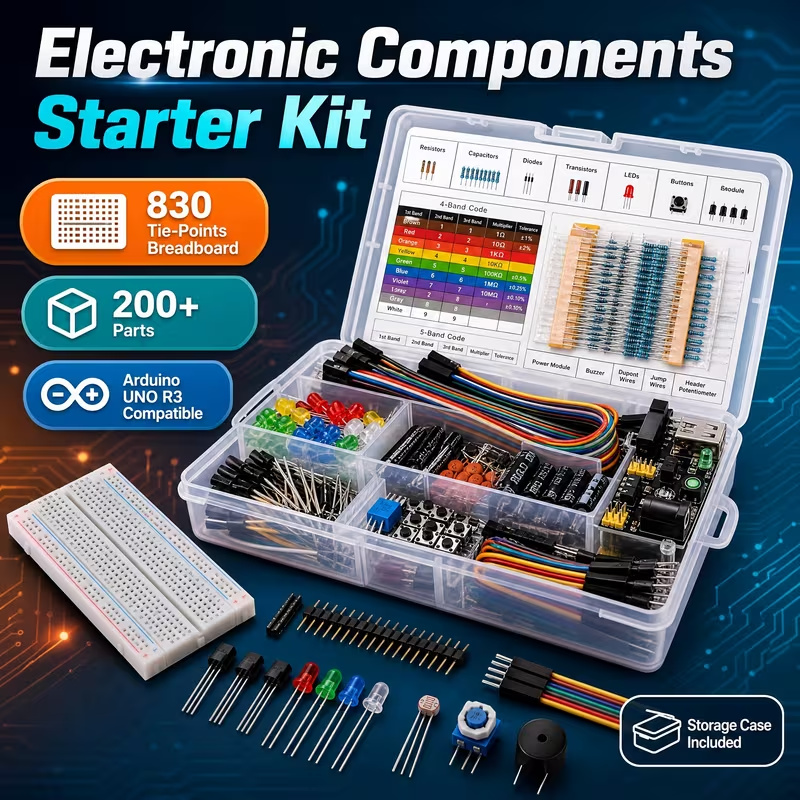
Breadboard, wires and assorted parts. Arduino controller board not included.
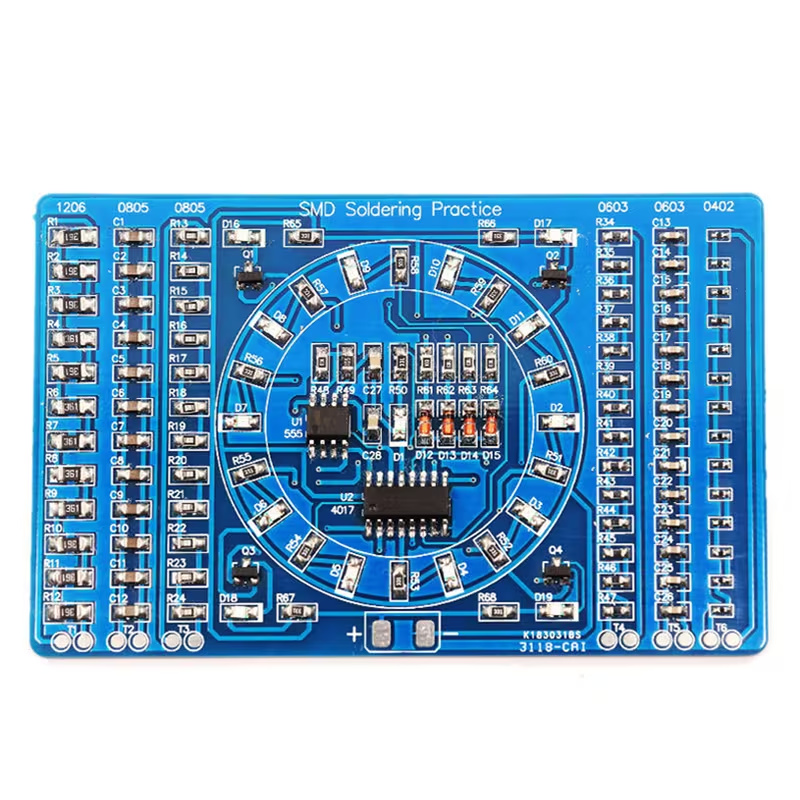
Surface-mount soldering practice. Battery and battery holder not included.
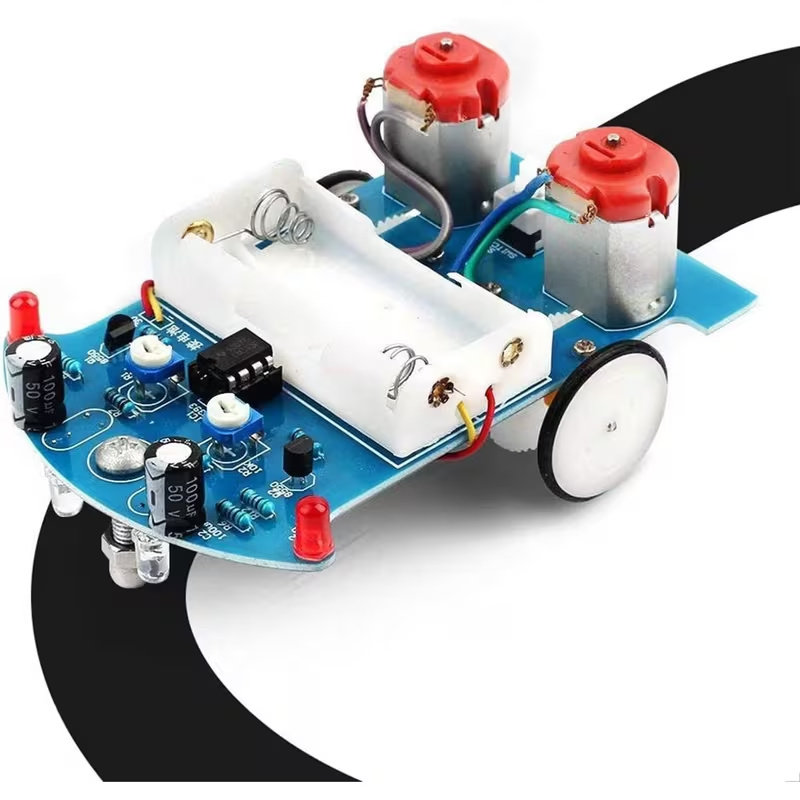
Soldering and assembly required. Check battery and track requirements before buying.
Tricky Circuit may earn a commission through these links. Product ideas have not been bench-tested by Tricky Circuit and are not verified lesson parts lists.
Verify a 200 ns pulse using a dense capture, compare Normal and Peak acquisitions in the same overview, then model point picks and extrema.
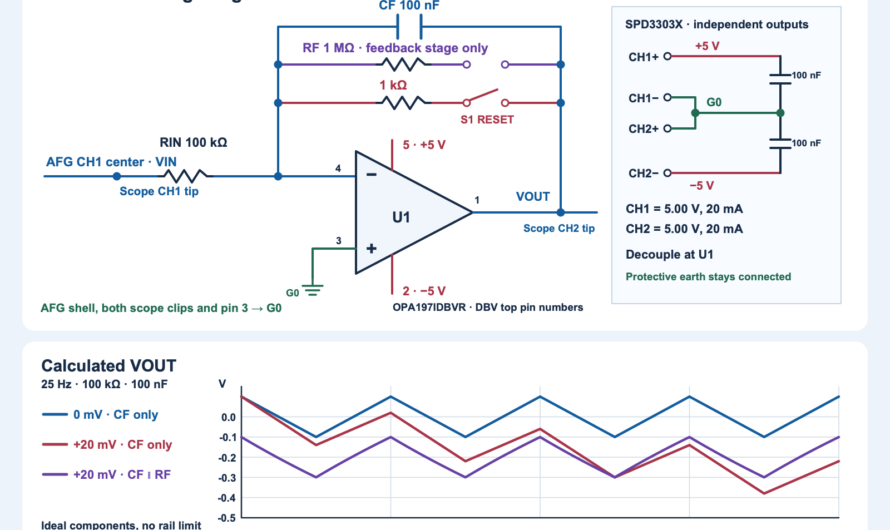
Measure how a +20 mV input offset makes a 25 Hz triangle drift, then add a 1 MΩ feedback resistor and verify where the OPA197 output settles.
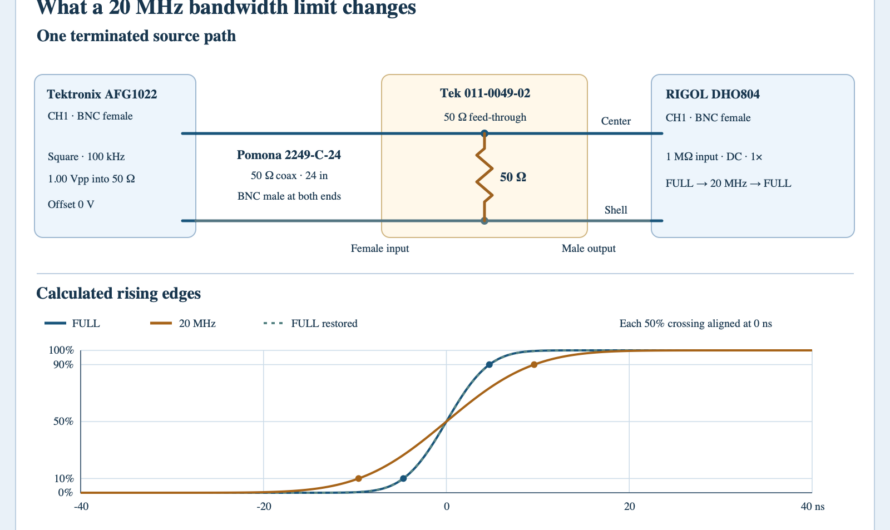
Keep a terminated scope input fixed and measure how its 20 MHz bandwidth limit changes 10–90% rise time across nine raw captures.
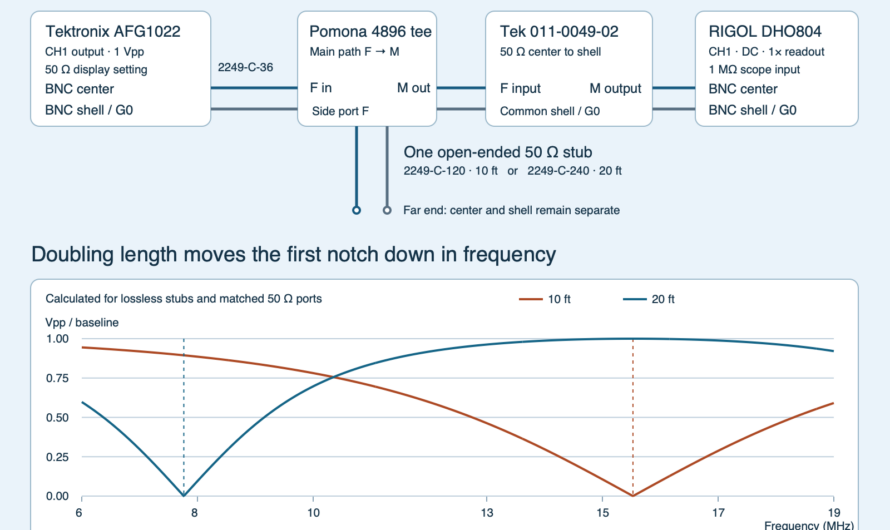
Use two open coax stubs to move a notch. Sweep both lengths, normalize against no-stub controls, and check where the longer stub passes the signal.
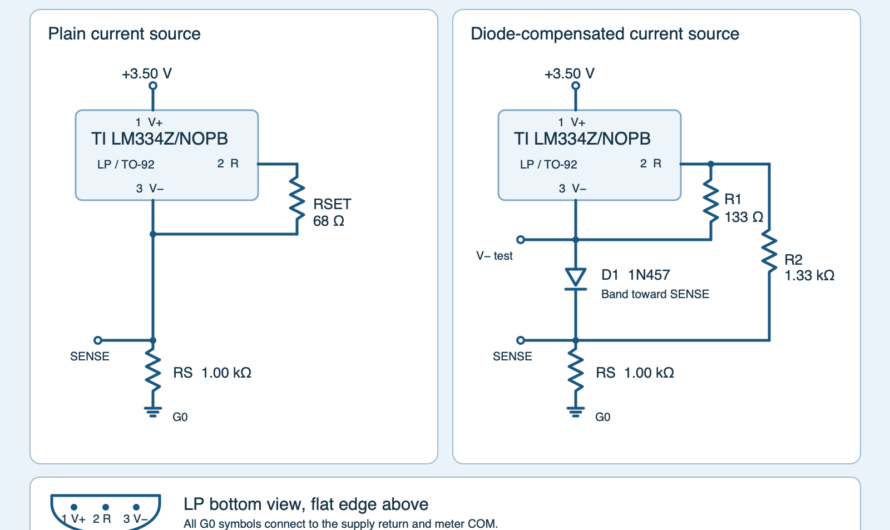
Build an LM334 current source and measure its temperature drift. Add one resistor and a 1N457 diode, then repeat the same room-to-warm test.
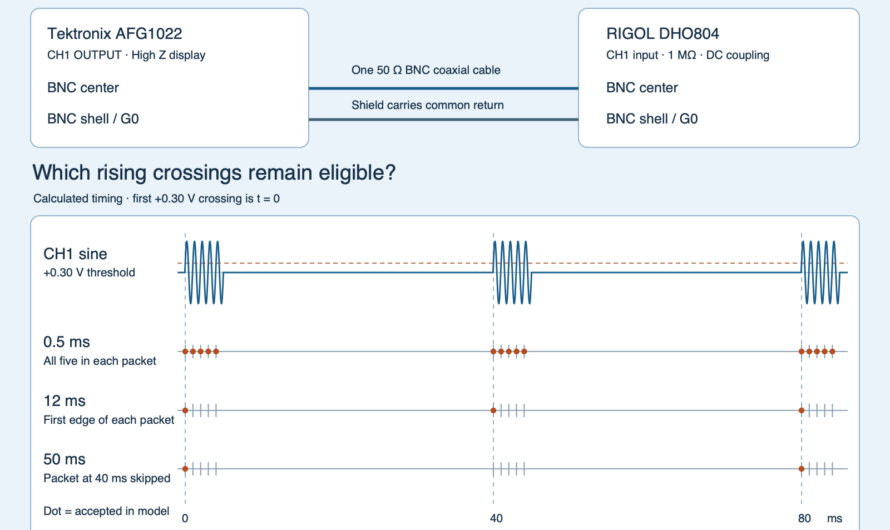
Capture five-cycle sine bursts, measure a useful oscilloscope holdoff range, and compare when short, practical and excessive settings accept edges.
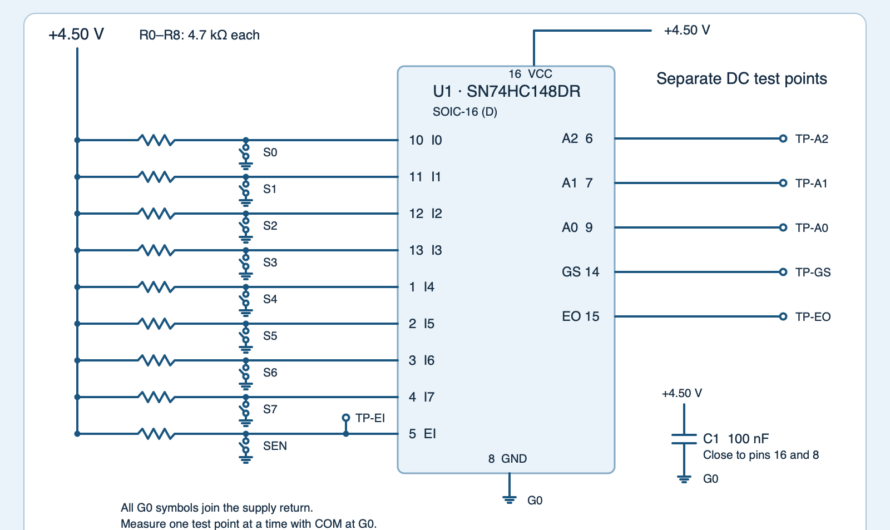
Wire an SN74HC148DR priority encoder and compare its five outputs. Separate idle from request zero and see what happens when two switches close.
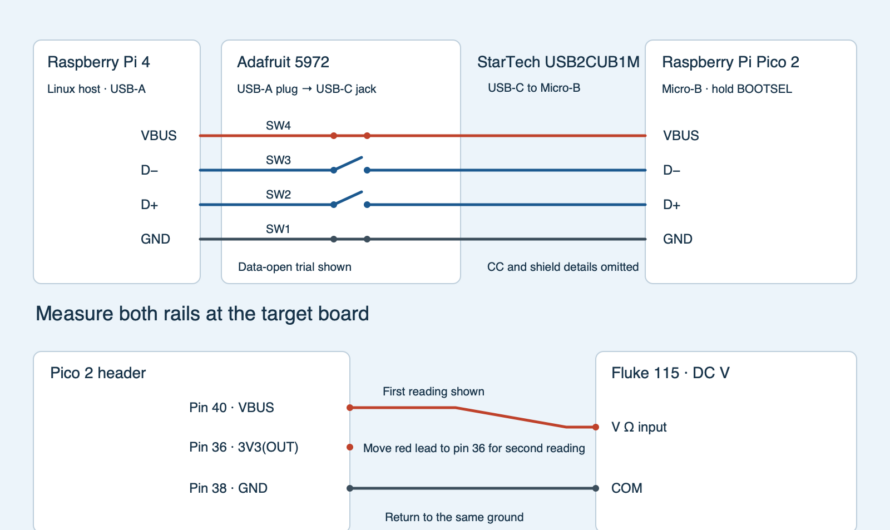
Power a Pico 2 with its USB data pair open and compare its rails with Linux’s device inventory. Restore the pair to verify the same host port.
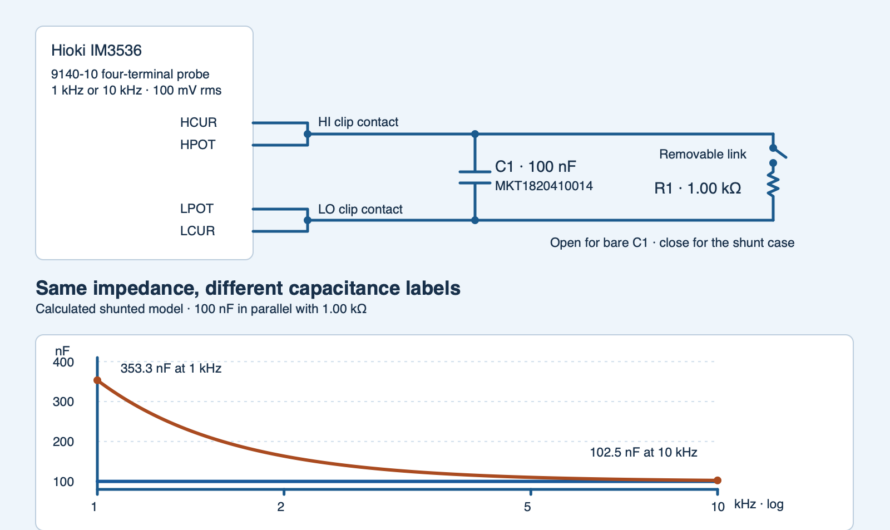
Measure a film capacitor with a parallel resistor and compare Cs with Cp. Use the meter’s impedance to explain the difference at two frequencies.
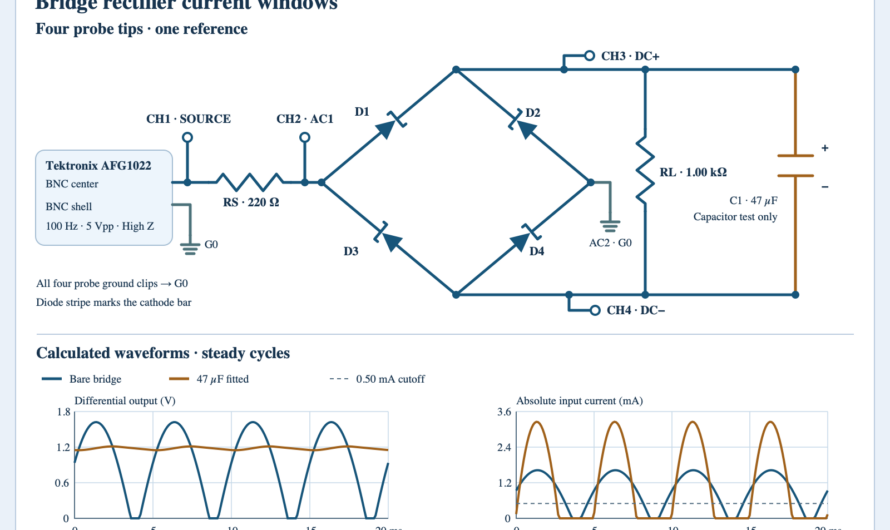
Use four scope traces to compare bridge rectifier current windows, peak input current and output ripple before and after adding capacitance.
Explore these do-it-yourself project kits. Check the selected option, included parts and instructions on each offer.
Tricky Circuit may earn a commission if you buy through these Temu affiliate links. These are product ideas; they have not been bench-tested by Tricky Circuit and are not verified lesson parts lists.
Supplier product photo
Listing specifies 5-volt direct current. Soldering required; battery and glue not included.
Supplier product photo
Breadboard, wires and assorted parts. Arduino controller board not included.
Supplier product photo
Surface-mount soldering practice. Battery and battery holder not included.
Supplier product photo
Soldering and assembly required. Check battery and track requirements before buying.