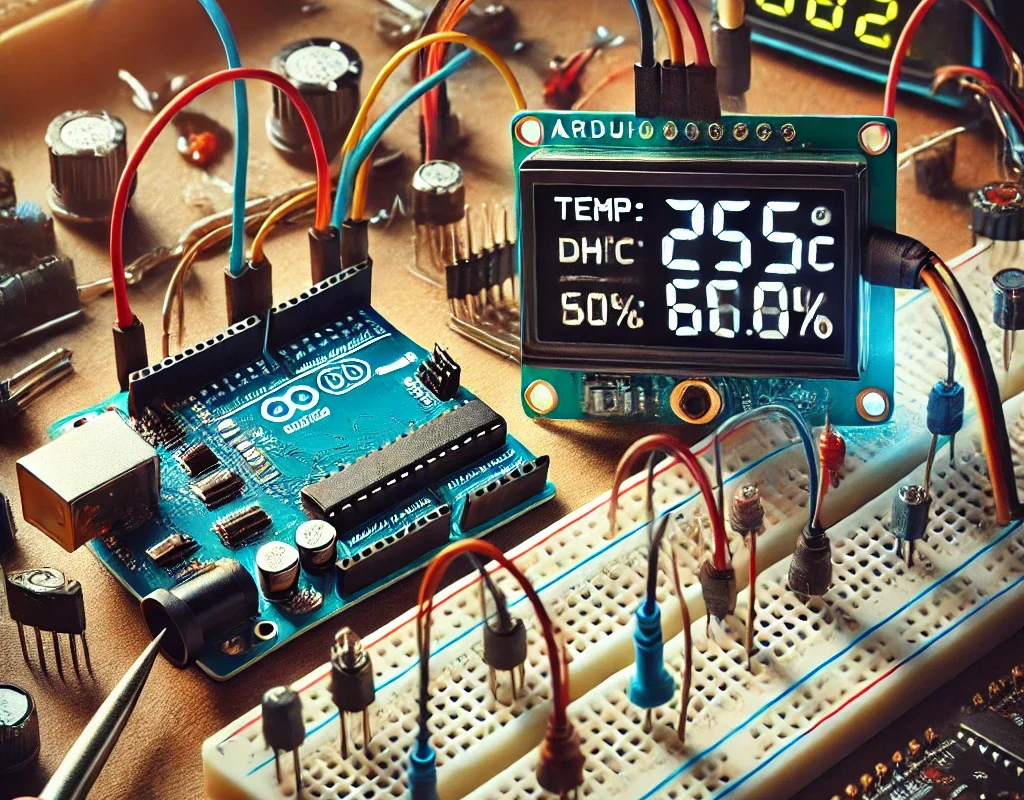
🔧 Components Needed
- Arduino Board (e.g., Arduino Uno or Arduino R4)
- DHT11 Sensor
- I2C LCD 1602 Display
- Jumper Wires
- Breadboard (optional for easy wiring)
📌 Wiring Connections
1. DHT11 Sensor:
- VCC (Red Wire): Connect to 5V on Arduino
- GND (Black Wire): Connect to GND on Arduino
- Data (Yellow Wire): Connect to a digital pin (we’ll use pin 2 in the code)
2. I2C LCD 1602 Display:
- VCC: Connect to 5V on Arduino
- GND: Connect to GND on Arduino
- SDA: Connect to Arduino A4 (on Uno) or appropriate I2C SDA pin on your board
- SCL: Connect to Arduino A5 (on Uno) or appropriate I2C SCL pin on your board
Note: The I2C address for the LCD is often 0x27. If yours is different, adjust the code accordingly.
💻 Code Example
Make sure to install the following libraries in your Arduino IDE:
- DHT sensor library (e.g., “DHT sensor library” by Adafruit)
- LiquidCrystal_I2C library
Here’s the code:
#include <DHT.h>
#include <LiquidCrystal_I2C.h>

// ----- DHT Sensor Settings -----
#define DHTPIN 2           // DHT11 data pin connected to digital pin 2
#define DHTTYPE DHT11      // We're using the DHT11 sensor
DHT dht(DHTPIN, DHTTYPE);

// ----- LCD Settings -----
LiquidCrystal_I2C lcd(0x27, 16, 2);  // Set the LCD I2C address to 0x27 with 16 columns and 2 rows

void setup() {
  Serial.begin(9600);
  dht.begin();            // Initialize DHT sensor

  // Initialize the LCD
  lcd.init();
  lcd.backlight();        // Turn on the backlight
  lcd.setCursor(0, 0);
  lcd.print("Temp & Humidity");
  delay(2000);
}

void loop() {
  // ----- Wait a bit between measurements -----
  delay(2000);

  // ----- Read the humidity and temperature values -----
  float humidity = dht.readHumidity();
  float temperature = dht.readTemperature();

  // Check if any reads failed and exit early (to try again)
  if (isnan(humidity) || isnan(temperature)) {
    Serial.println("Failed to read from DHT sensor!");
    lcd.clear();
    lcd.setCursor(0, 0);
    lcd.print("Sensor Error");
    return;
  }

  // ----- Print values to Serial Monitor for debugging -----
  Serial.print("Humidity: ");
  Serial.print(humidity);
  Serial.print(" %  ");
  Serial.print("Temperature: ");
  Serial.print(temperature);
  Serial.println(" *C");

  // ----- Display the temperature and humidity on the LCD -----
  lcd.clear();

  // Display temperature on the first row
  lcd.setCursor(0, 0);
  lcd.print("Temp: ");
  lcd.print(temperature);
  lcd.print((char)223);  // Degree symbol
  lcd.print("C");

  // Display humidity on the second row
  lcd.setCursor(0, 1);
  lcd.print("Hum:  ");
  lcd.print(humidity);
  lcd.print(" %");
}
📋 How It Works
- DHT Sensor:
- The DHT11 sensor reads temperature and humidity values.
- The
dht.readHumidity()anddht.readTemperature()functions retrieve these values, and error-checking ensures valid data.
- I2C LCD Display:
- The
LiquidCrystal_I2Clibrary initializes the LCD with a specified I2C address (commonly 0x27). - The code clears the display and updates it every 2 seconds with the current temperature (first row) and humidity (second row).
- The
- Serial Monitor:
- The data is also printed to the Serial Monitor for debugging and real-time tracking.
🎯 Project Enhancements
- Data Logging:
- Save readings to an SD card for historical tracking.
- Wireless Connectivity:
- Integrate a WiFi module (like the Arduino R4 WiFi) to send data to a cloud service.
- Alarm System:
- Trigger alerts if temperature or humidity exceeds certain thresholds.
Enjoy building your Temperature & Humidity Monitor project with the DHT11 sensor and I2C LCD 1602! Happy coding! 😊👍