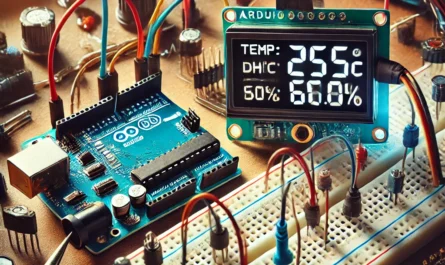
The DHT11 is a low-cost digital temperature and humidity sensor that is widely used in weather monitoring, home automation, and IoT applications. It provides real-time temperature and humidity readings using a simple one-wire communication protocol, making it easy to interface with microcontrollers like Arduino, ESP32, Raspberry Pi, and STM32.
🔹 1. What is the DHT11?
- DHT11 is a digital temperature and humidity sensor with a built-in capacitive humidity sensing element and a thermistor for measuring temperature.
- Uses a single digital data pin for communication, making it easy to integrate into microcontroller-based projects.
- Operating voltage: 3.3V – 5V, making it compatible with Arduino, ESP32, and Raspberry Pi.
📌 Key Features:
- Temperature Range: 0°C to 50°C (±2°C accuracy). More about Accuracy->
- Humidity Range: 20% to 90% RH (±5% accuracy). More about Accuracy->
- Supply Voltage: 3.3V – 5V.
- Sampling Rate: 1 reading per second (1Hz).
- Communication Protocol: Single-wire digital signal.
- Low power consumption.
📌 Common Applications:
- Weather monitoring stations.
- Home automation and smart homes.
- Greenhouse and indoor climate monitoring.
- IoT-based environmental monitoring.
- Industrial humidity control systems.
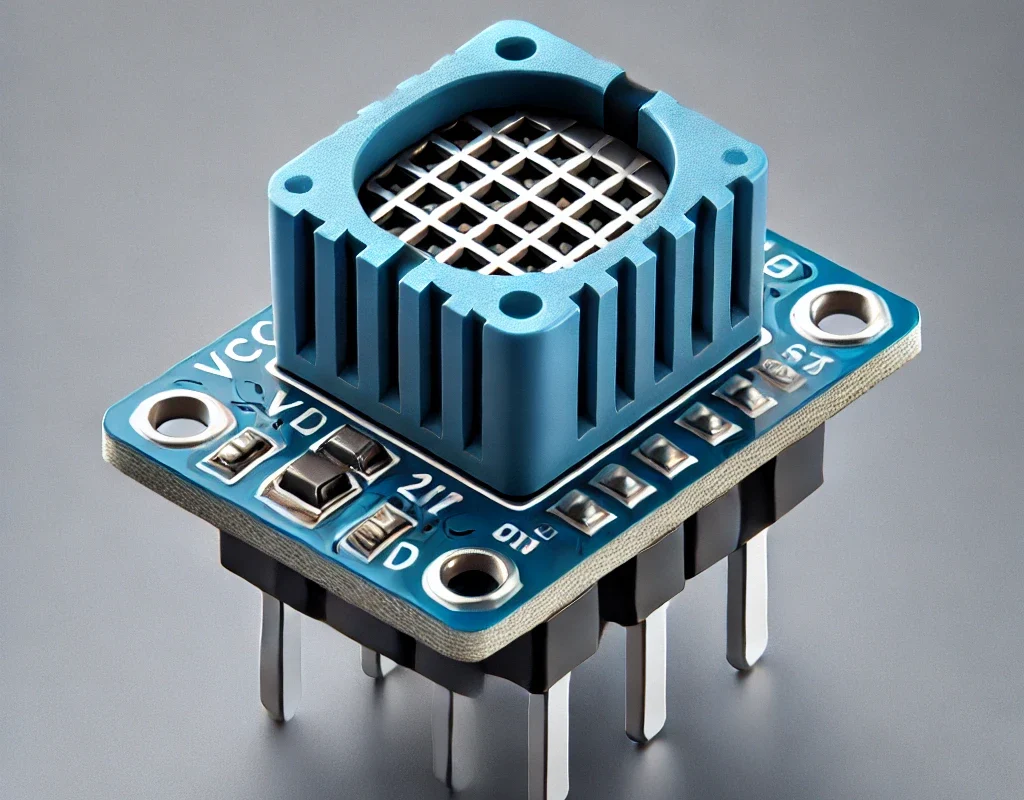
🔹 2. DHT11 Pinout & Functions
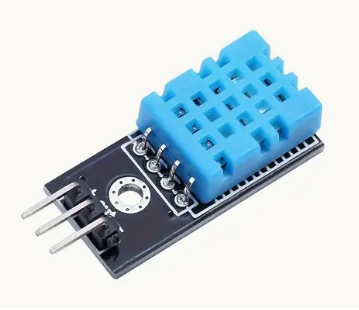
The DHT11 sensor comes in two forms:
- Standalone DHT11 sensor (4 pins)
- DHT11 module (3 pins with built-in pull-up resistor).
| Pin No. | Name | Function |
|---|---|---|
| 1 | VCC | Power Supply (3.3V – 5V) |
| 2 | Data (OUT) | Digital Data Output (One-wire communication) |
| 3 | NC (Not Connected) | Unused (leave unconnected) |
| 4 | GND | Ground (0V) |
📌 Note:
- If using a standalone DHT11, connect a 4.7kΩ – 10kΩ pull-up resistor between the Data pin and VCC.
- DHT11 modules already include a pull-up resistor, so no additional resistor is needed.
🔹 3. Wiring the DHT11 with an Arduino
🛠 Required Components
- 1x Arduino (Uno, Nano, Mega, ESP32, etc.)
- 1x DHT11 Sensor
- 1x 10kΩ Resistor (if using the 4-pin version)
- Jumper Wires
🛠 Wiring:
| DHT11 Pin | Arduino Pin |
|---|---|
| VCC (Pin 1) | 5V (or 3.3V for ESP32/Raspberry Pi) |
| Data (Pin 2) | Digital Pin (e.g., D2 on Arduino) |
| GND (Pin 4) | GND |
📌 For standalone DHT11: Connect a 10kΩ pull-up resistor between Data and VCC.
🔹 4. Arduino Code to Read DHT11 Sensor
We use the DHT library to easily communicate with the sensor.
🛠 Install the DHT Library
- Open Arduino IDE.
- Go to Sketch → Include Library → Manage Libraries.
- Search for “DHT sensor library by Adafruit” and install it.
✅ Arduino Code for DHT11
#include <DHT.h>

#define DHTPIN 2        // DHT11 connected to digital pin 2
#define DHTTYPE DHT11   // Define sensor type

DHT dht(DHTPIN, DHTTYPE);

void setup() {
    Serial.begin(9600);
    dht.begin();
}

void loop() {
    float temperature = dht.readTemperature();  // Read temperature (Celsius)
    float humidity = dht.readHumidity();       // Read humidity

    if (isnan(temperature) || isnan(humidity)) {
        Serial.println("Failed to read from DHT11 sensor!");
        return;
    }

    Serial.print("Temperature: ");
    Serial.print(temperature);
    Serial.println(" °C");

    Serial.print("Humidity: ");
    Serial.print(humidity);
    Serial.println(" %");

    delay(2000);  // Wait 2 seconds before next reading
}
📌 How it works:
- The
dht.readTemperature()function reads the temperature in Celsius. - The
dht.readHumidity()function reads the humidity percentage. - If the sensor fails to respond, it prints an error message.
- Data is updated every 2 seconds (recommended by the DHT11 specs).
🔹 5. DHT11 vs DHT22: Which One to Use?
The DHT22 (AM2302) is a more accurate and wider-range version of the DHT11.
| Feature | DHT11 | DHT22 (AM2302) |
|---|---|---|
| Temperature Range | 0 to 50°C | -40 to 80°C |
| Temperature Accuracy | ±2°C | ±0.5°C |
| Humidity Range | 20% to 90% RH | 0% to 100% RH |
| Humidity Accuracy | ±5% RH | ±2% RH |
| Sampling Rate | 1 Hz (1s) | 0.5 Hz (2s) |
| Cost | Cheaper (~$2-3) | More Expensive (~$5-7) |
📌 Verdict:
- Use DHT11 for simple low-cost projects where ±2°C accuracy is acceptable.
- Use DHT22 if you need better accuracy and wider temperature range.
🌡️ DHT11 vs. DHT22: Detailed Comparison
🔹 6. Common Issues & Fixes
❌ Sensor not responding? ✅ Check wiring, pull-up resistor, and power supply.
❌ Incorrect temperature/humidity readings? ✅ Allow the sensor to stabilize for a few seconds after startup.
❌ Slow updates? ✅ DHT11 updates every 1 second. Use a faster sensor (DHT22 or AM2302) if needed.
🎯 Conclusion
- DHT11 is a simple, low-cost digital sensor for temperature and humidity.
- Easy to connect with only 1 data pin.
- Best for beginner projects, home automation, and IoT applications.
- For better accuracy, use DHT22 instead.