Tinkercad is a free, web-based tool by Autodesk for designing 3D models, electronic circuits, and coding simulations. It is widely used by beginners, students, and hobbyists for learning 3D design, Arduino programming, and electronics prototyping.
🔹 1. What Can You Do in Tinkercad?
✅ 3D Design
- Create 3D models using basic shapes.
- Modify and combine objects to design prototypes, models, and printable objects.
- Export models for 3D printing (.STL, .OBJ, .GLTF formats).
✅ Circuits Simulation
- Design and simulate electronic circuits using Arduino, sensors, motors, and displays.
- Supports components like LEDs, resistors, transistors, motors, servos, and LCD displays.
- Simulate code execution on Arduino (C++/Blocks programming).
✅ Block & Text-Based Coding
- Block coding (drag-and-drop) for beginners.
- Text-based coding (C++ for Arduino, JavaScript for 3D modeling).
🔹 2. Getting Started with Tinkercad
🔸 Step 1: Create an Account
- Visit Tinkercad
- Click Sign Up (or Log In if you have an account).
- Choose Personal, Educator, or Student account.
🔸 Step 2: Choose Your Workspace
- 3D Design – To create and modify 3D objects.
- Circuits – To design and simulate Arduino projects.
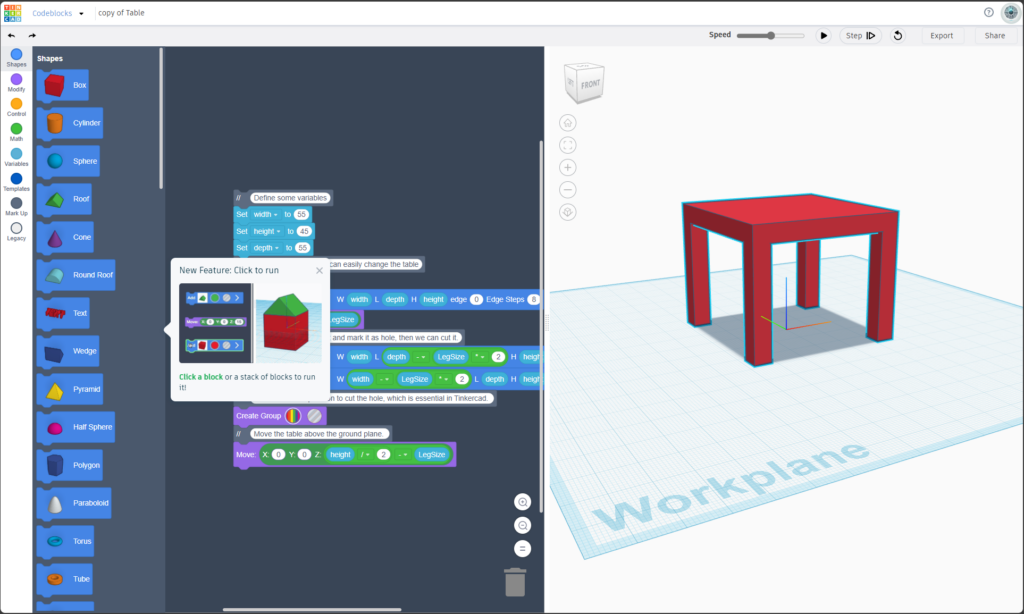
- Codeblocks – To create 3D models using coding.
🔹 3. Using Tinkercad for Electronics (Circuits)
✅ Adding Components
- Open Tinkercad Circuits.
- Click Create New Circuit.
- Use the Components Panel to add resistors, LEDs, sensors, motors, relays, and microcontrollers (Arduino, ATtiny, etc.).
- Drag and drop components onto the breadboard or workspace.
✅ Wiring Components
- Click on the pins of components to create connections.
- Use color-coded wires to keep the circuit organized.
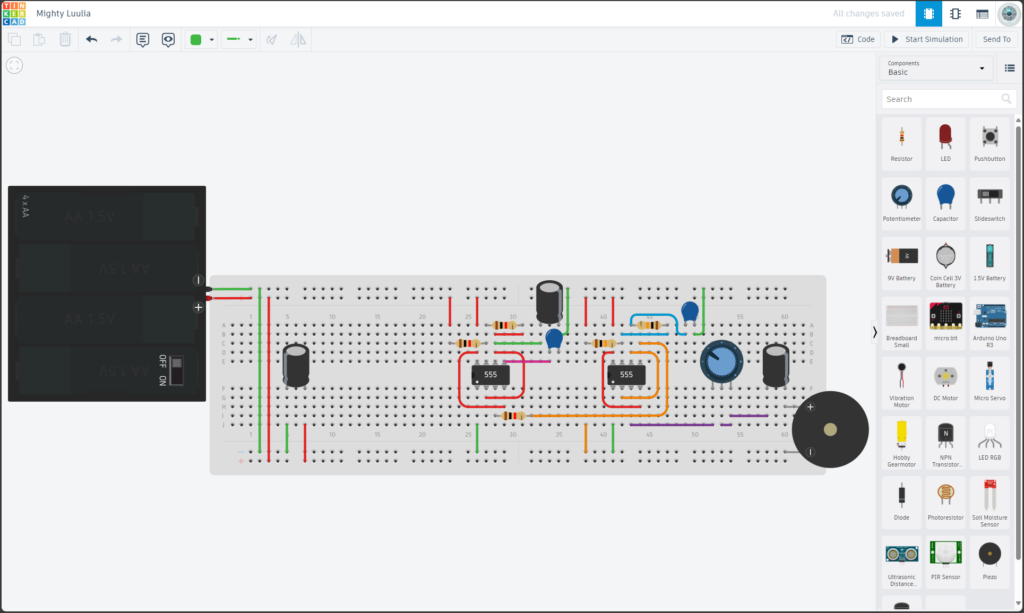
✅ Coding in Arduino Mode
- Click Code > Choose Blocks or Text Mode (C++).
- Write Arduino code (like in Arduino IDE).
- Click Start Simulation to test.
🔹 4. Example: Blink LED with Arduino in Tinkercad
🔸 Step 1: Add Components
- 1x Arduino Uno
- 1x LED
- 1x Resistor (220Ω)
- Jumper Wires
🔸 Step 2: Wiring

| Component | Arduino Pin |
|---|---|
| LED Anode (+) | D13 |
| LED Cathode (-) | GND |
| Resistor (220Ω) | Between LED Anode and D13 |
🔸 Step 3: Write Arduino Code
void setup() {
  pinMode(13, OUTPUT);  // Set Pin 13 as Output
}

void loop() {
  digitalWrite(13, HIGH);  // Turn LED ON
  delay(1000);             // Wait 1 second
  digitalWrite(13, LOW);   // Turn LED OFF
  delay(1000);             // Wait 1 second
}
🔸 Step 4: Simulate
- Click “Start Simulation”.
- LED should blink every 1 second.
🔹 5. Using Tinkercad for 3D Design
✅ Basic Tools in 3D Design
- Shapes Panel – Drag and place basic objects (cube, sphere, cylinder).
- Modify Objects – Resize, rotate, group, and align.
- Hole Tool – Create cutouts and complex designs.
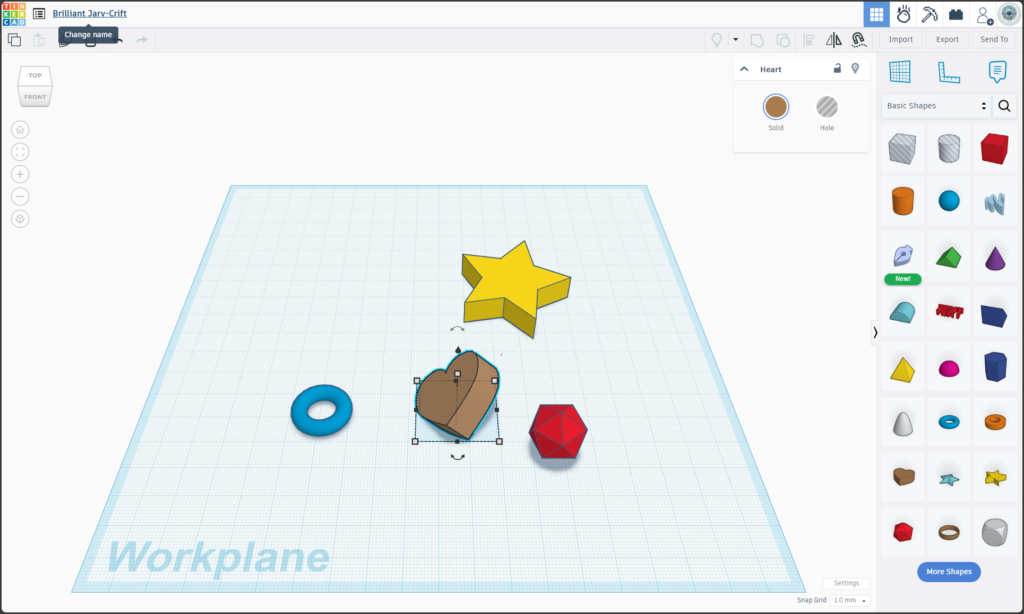
✅ Exporting 3D Models
- Click Export → Choose .STL for 3D printing.
🔹 6. Benefits of Using Tinkercad
✅ Free & Web-Based – No installation required.
✅ Beginner-Friendly – Easy drag-and-drop interface.
✅ Simulate Arduino Projects – Test code without real hardware.
✅ Supports 3D Printing – Create and print 3D models.
✅ Works on Any Device – PC, Mac, Chromebook, Tablet.
🔹 7. Advanced Features
- Import .STL, .OBJ files for modifying existing models.
- Use Tinkercad Codeblocks to programmatically create 3D objects.
- Save projects to Autodesk Fusion 360 for professional CAD work.
🎯 Conclusion
Tinkercad is a powerful, easy-to-use tool for learning Arduino, electronics, and 3D design. Whether you’re a beginner, student, or hobbyist, it’s a great way to experiment, prototype, and learn coding and circuit design.