
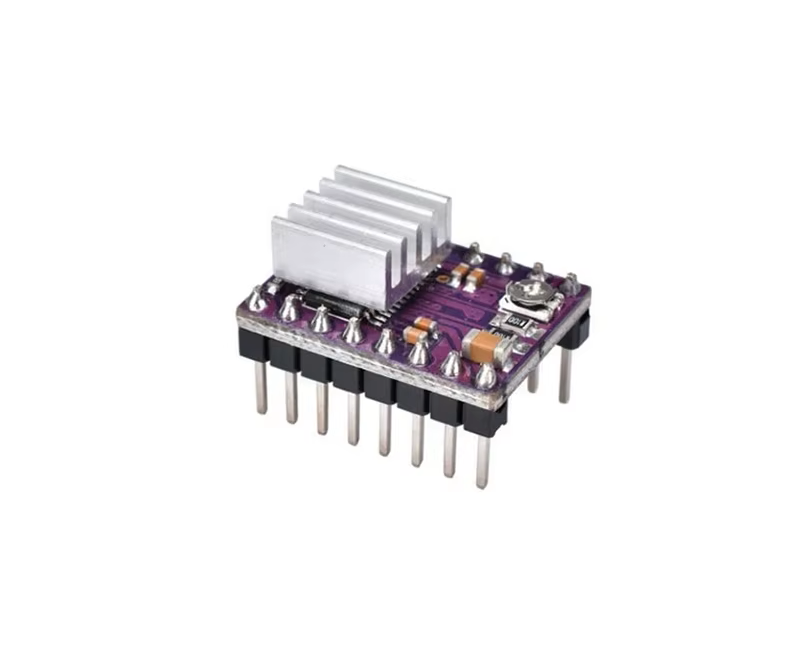
The DRV8825 is a high-power stepper motor driver module widely used in 3D printers, CNC machines, and robotics. It provides precise control over stepper motors and supports microstepping, allowing for smooth and accurate movement.
🔹 1. What is the DRV8825?
- The DRV8825 is a bipolar stepper motor driver that can drive NEMA 17 and NEMA 23 stepper motors.
- It is more powerful than the A4988, offering higher current handling and microstepping precision.
- Works with Arduino, Raspberry Pi, ESP32, and other microcontrollers.
📌 Key Features:
- Motor Voltage: 8.2V – 45V
- Logic Voltage: 3.3V / 5V (Arduino Compatible)
- Max Current: 2.5A per coil (with cooling)
- Microstepping Support: 1, 1/2, 1/4, 1/8, 1/16, 1/32 steps
- Thermal & Overcurrent Protection
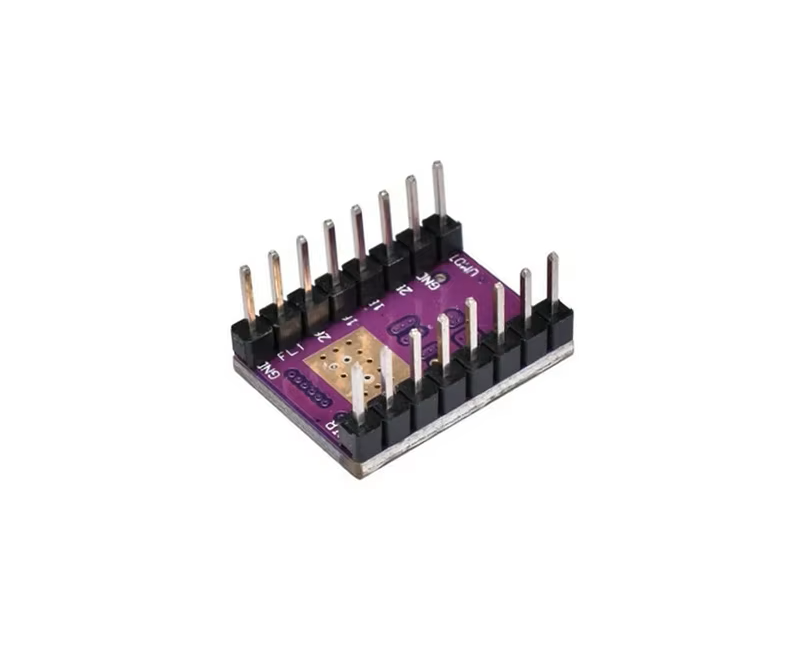
🔹 2. DRV8825 Pinout & Functions
The DRV8825 module has 16 pins for motor control and microstepping configuration.
| Pin | Function | Connection |
|---|---|---|
| VMOT | Motor Power (8.2V – 45V) | External Power Supply |
| GND | Ground | Common Ground |
| VCC | Logic Power (3.3V – 5V) | Arduino 5V |
| GND | Ground | Common Ground |
| STEP | Step Signal (Pulse Input) | Arduino Digital Pin |
| DIR | Direction Control | Arduino Digital Pin |
| EN (Enable) | Enables Driver (LOW = ON) | Arduino Digital Pin |
| MS1, MS2, MS3 | Microstepping Settings | Set to GND / VCC |
| SLEEP | Sleep Mode (LOW = Off) | Pull HIGH to Enable |
| RESET | Reset Driver | Pull HIGH to Enable |
| FAULT | Error Indicator | Not Required |
| OUT1, OUT2, OUT3, OUT4 | Motor Coil Outputs | Stepper Motor Coils |
📌 Important:
- VMOT must be connected to motor power (e.g., 12V, 24V).
- Microstepping (MS1, MS2, MS3) determines step resolution.
- STEP & DIR control motor speed and direction.
🔹 3. How DRV8825 Works
- The DRV8825 receives signals from the microcontroller to move the stepper motor one step at a time.
- Pulse on STEP pin → Moves motor one step.
- DIR pin controls direction (HIGH = Clockwise, LOW = Counterclockwise).
- Microstepping reduces vibrations and provides precise motor control.
📌 Microstepping Settings (MS1, MS2, MS3 Pins)
| MS1 | MS2 | MS3 | Microstep Mode |
|---|---|---|---|
| LOW | LOW | LOW | Full Step (1x) |
| HIGH | LOW | LOW | 1/2 Step |
| LOW | HIGH | LOW | 1/4 Step |
| HIGH | HIGH | LOW | 1/8 Step |
| LOW | LOW | HIGH | 1/16 Step |
| HIGH | LOW | HIGH | 1/32 Step |
🔹 4. Connecting DRV8825 to Arduino
🛠 Required Components
- 1x Arduino (Uno, Mega, etc.)
- 1x DRV8825 Stepper Motor Driver
- 1x NEMA 17 Stepper Motor
- 1x 12V or 24V Power Supply
- 1x 100µF Capacitor (Prevents Voltage Spikes)
- Jumper Wires
🛠 Wiring
| DRV8825 Pin | Arduino Pin / Connection |
|---|---|
| VMOT | 12V or 24V Power |
| GND | Common Ground |
| VCC | 5V (Arduino) |
| GND | GND (Arduino & Motor Supply) |
| STEP | D9 |
| DIR | D8 |
| EN | D7 (Optional, LOW to Enable) |
| MS1, MS2, MS3 | Set for Microstepping (GND/VCC) |
| OUT1, OUT2, OUT3, OUT4 | Stepper Motor Coils |
📌 Always connect a 100µF capacitor across VMOT & GND to prevent voltage spikes.
🔹 5. Arduino Code for Controlling a Stepper Motor
#define STEP_PIN 9
#define DIR_PIN 8

void setup() {
    pinMode(STEP_PIN, OUTPUT);
    pinMode(DIR_PIN, OUTPUT);
}

void loop() {
    digitalWrite(DIR_PIN, HIGH); // Set Direction (Clockwise)

    for (int i = 0; i < 200; i++) {  // Move 1 full revolution (200 steps)
        digitalWrite(STEP_PIN, HIGH);
        delayMicroseconds(500);  // Control Speed
        digitalWrite(STEP_PIN, LOW);
        delayMicroseconds(500);
    }

    delay(1000); // Pause

    digitalWrite(DIR_PIN, LOW); // Change Direction (Counterclockwise)

    for (int i = 0; i < 200; i++) {
        digitalWrite(STEP_PIN, HIGH);
        delayMicroseconds(500);
        digitalWrite(STEP_PIN, LOW);
        delayMicroseconds(500);
    }

    delay(1000);
}
📌 What happens?
- The motor rotates 1 full revolution clockwise.
- Pauses for 1 second.
- Then rotates 1 full revolution counterclockwise.
🔹 6. Adjusting DRV8825 Current Limit
To prevent motor overheating or overcurrent damage, the current limit must be set correctly.
✅ Formula for Current Limit
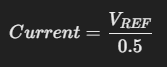
- VREF = Reference Voltage (Measure with Multimeter on VREF Pin)
- Max Current = 2.5A (With Heatsink)
- Set VREF between 0.5V – 1.2V
📌 To Adjust Current:
- Measure VREF using a multimeter (Touch the small potentiometer on DRV8825).
- Turn the potentiometer clockwise to increase, counterclockwise to decrease.
- For NEMA 17 stepper motors (1.5A max), set VREF to ~0.75V.
🔹 7. Applications of DRV8825
✅ 3D Printers – Controls precise motor movements.
✅ CNC Machines – Used for stepper motor control.
✅ Robotics – Drives robotic arms, wheels, and actuators.
✅ Automated Systems – Used in conveyor belts, automation.
✅ DIY Motorized Projects – Any project requiring high-precision motor control.
🔹 8. DRV8825 vs Other Stepper Drivers
| Feature | DRV8825 | A4988 | TMC2209 |
|---|---|---|---|
| Max Voltage | 45V | 35V | 29V |
| Max Current | 2.5A | 1.5A | 2.0A |
| Microstepping | 1/32 | 1/16 | 1/256 |
| Heat Dissipation | Moderate | High | Low |
| Best For | High-power steppers | Low-power motors | Silent operation |
📌 Verdict:
- DRV8825 is better than A4988 for higher power motors.
- TMC2209 is best for silent operation.
🎯 Conclusion
- The DRV8825 is a high-performance stepper motor driver with 1/32 microstepping.
- Handles up to 2.5A per coil, making it stronger than A4988.
- Used in 3D printers, CNC machines, and robotic applications.
- Supports PWM control, direction control, and current adjustment.