The AMS1117-3.3V is a linear voltage regulator that converts 5V to 3.3V, commonly used to power low-voltage components like ESP8266, sensors, and microcontrollers.
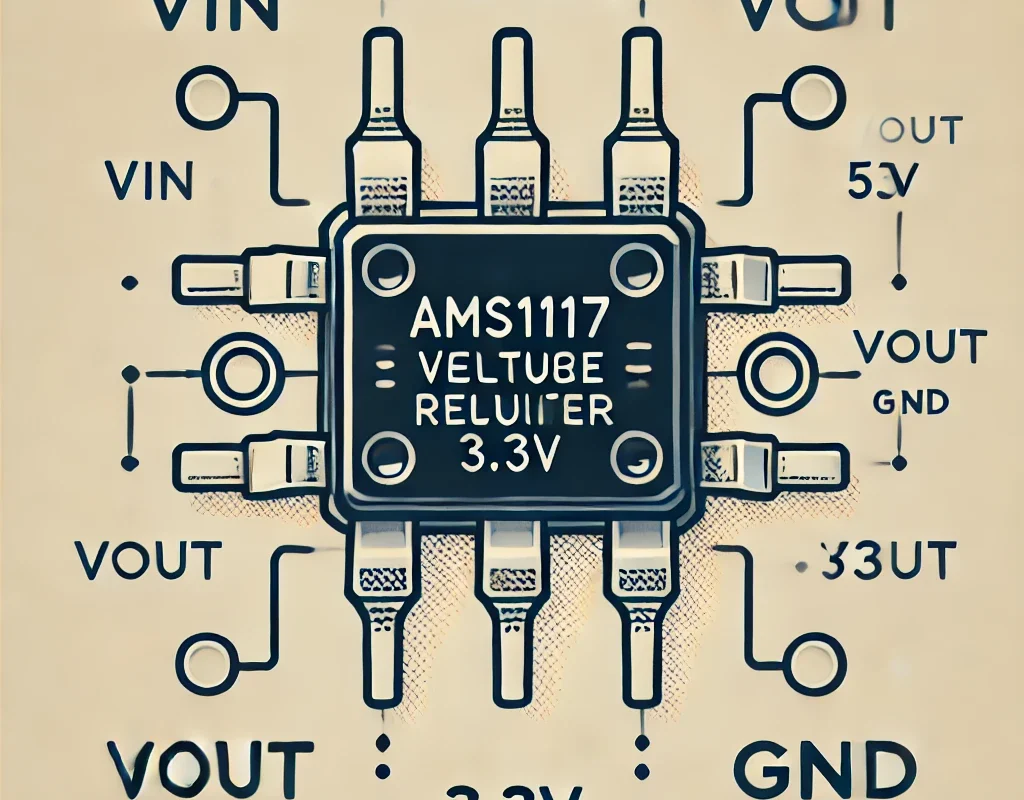
1. AMS1117-3.3V Pinout
The AMS1117-3.3V has three pins:
- VIN (Input) – Connects to a 5V power source.
- GND (Ground) – Common ground for input and output.
- VOUT (Output) – Provides 3.3V regulated output.
2. Wiring AMS1117-3.3V to Arduino
🛠 Required Components
- AMS1117-3.3V voltage regulator.
- 2x Capacitors (10µF each, optional but recommended).
- 5V Power Source (Arduino 5V, USB, or battery).
- Wires and a breadboard.
🛠 Wiring Diagram
- Power the AMS1117:
- VIN → 5V (from Arduino, USB, or battery).
- GND → GND (common ground).
- Regulated Output:
- VOUT → 3.3V (connect to the 3.3V device).
- GND → GND (common ground for 3.3V circuit).
- Add Capacitors (Recommended for Stability)
- 10µF capacitor between VIN and GND.
- 10µF capacitor between VOUT and GND.
3. Example Use Case: Powering an ESP8266
The ESP8266 Wi-Fi module operates at 3.3V and should not be powered directly from 5V. Use the AMS1117-3.3V to step down voltage:
- 5V from Arduino → AMS1117 VIN
- GND from Arduino → AMS1117 GND
- AMS1117 VOUT (3.3V) → ESP8266 VCC
- GND (common ground) → ESP8266 GND
4. Important Notes
⚠️ AMS1117 has a voltage dropout of ~1.1V, meaning you need at least 4.4V input to get a stable 3.3V output.
⚠️ Maximum current output is ~800mA. If powering high-current devices, consider a DC-DC buck converter instead.
⚠️ Use heatsinks for high loads, as the AMS1117 dissipates heat in linear conversion.