
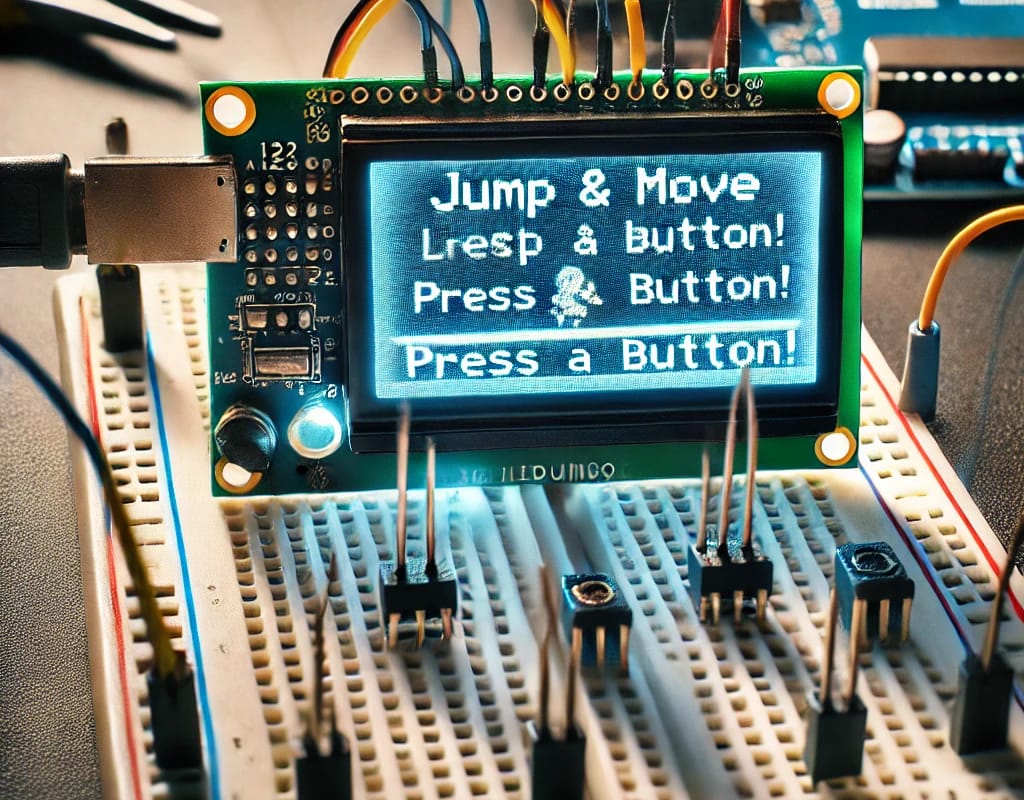
1️⃣ Components Needed
- Arduino Uno 🛠️
- I2C LCD 1602 Display 🖥️
- Pushbuttons (3): For left, right, and jump actions 🔘🔘🔘
- Breadboard 🧰
- Jumper Wires 🚀
- Resistors (10kΩ for pull-down) ⚡
2️⃣ Circuit Setup
- LCD Display:
- VCC to Arduino 5V
- GND to Arduino GND
- SDA to Arduino A4 (or the dedicated SDA pin)
- SCL to Arduino A5 (or the dedicated SCL pin)
- Buttons Setup:
- Connect each button in a manner such that:
- One terminal of each button connects to a digital pin (e.g., pins 2, 3, and 4 for left, jump, and right).
- The other terminal connects to the ground through a 10kΩ resistor.
- Connect each button in a manner such that:
3️⃣ Arduino Sketch
Here’s a simple sketch to start with. This code will initialize the display and read button inputs to move a character or make it jump.
#include <Wire.h>
#include <LiquidCrystal_I2C.h>

LiquidCrystal_I2C lcd(0x27, 16, 2);

const int buttonLeftPin = 2;
const int buttonJumpPin = 3;
const int buttonRightPin = 4;
int positionX = 7; // Start in the middle of the screen

void setup() {
  pinMode(buttonLeftPin, INPUT_PULLUP);
  pinMode(buttonJumpPin, INPUT_PULLUP);
  pinMode(buttonRightPin, INPUT_PULLUP);
  lcd.init();
  lcd.backlight();
  lcd.setCursor(positionX, 1);
  lcd.print("*"); // Character representation
}

void loop() {
  if (digitalRead(buttonLeftPin) == LOW) {
    moveLeft();
  }
  if (digitalRead(buttonRightPin) == LOW) {
    moveRight();
  }
  if (digitalRead(buttonJumpPin) == LOW) {
    jump();
  }
}

void moveLeft() {
  if (positionX > 0) {
    lcd.clear();
    lcd.setCursor(--positionX, 1);
    lcd.print("*");
    delay(200);
  }
}

void moveRight() {
  if (positionX < 15) {
    lcd.clear();
    lcd.setCursor(++positionX, 1);
    lcd.print("*");
    delay(200);
  }
}

void jump() {
  lcd.clear();
  lcd.setCursor(positionX, 0);
  lcd.print("*");
  delay(200); // Simulate jump duration
  lcd.clear();
  lcd.setCursor(positionX, 1);
  lcd.print("*");
}
4️⃣ Expanding Your Game
- Add Obstacles: Adding Obstacles to the Arduino LCD Game – Tricky Circuit
- Increase Difficulty: As the game progresses, increase the speed or add more challenges.
- Scoring System: Implement a scoring system based on distance or obstacles avoided.
This setup creates a very basic “Jump & Move” game using an Arduino, buttons, and an LCD. It’s a perfect foundation to explore more complex game mechanics and enhance your skills in programming and electronics design.


