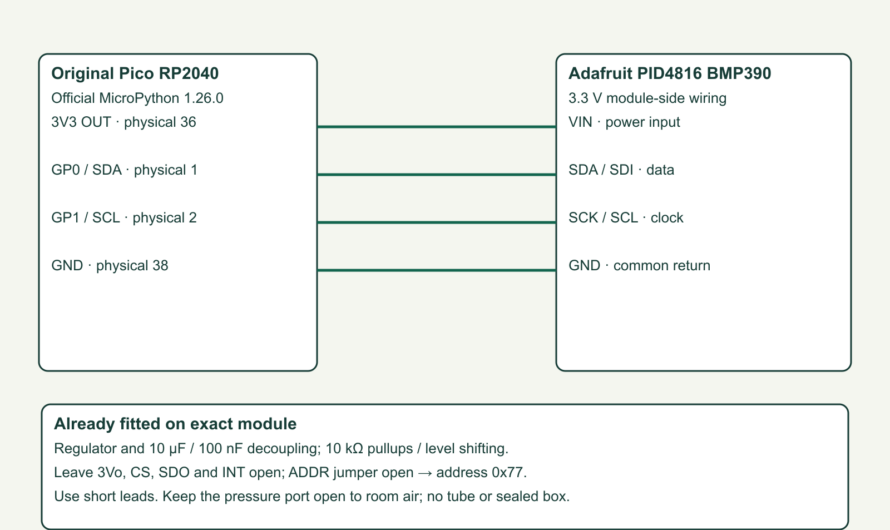
Pico BMP390: Pressure Is Not Automatically Height
Read fresh BMP390 pressure with a complete Pico driver. Track a short-lived local reference and show why weather, heating and air models prevent an automatic exact height.
Unravel the Mystery of Electronics
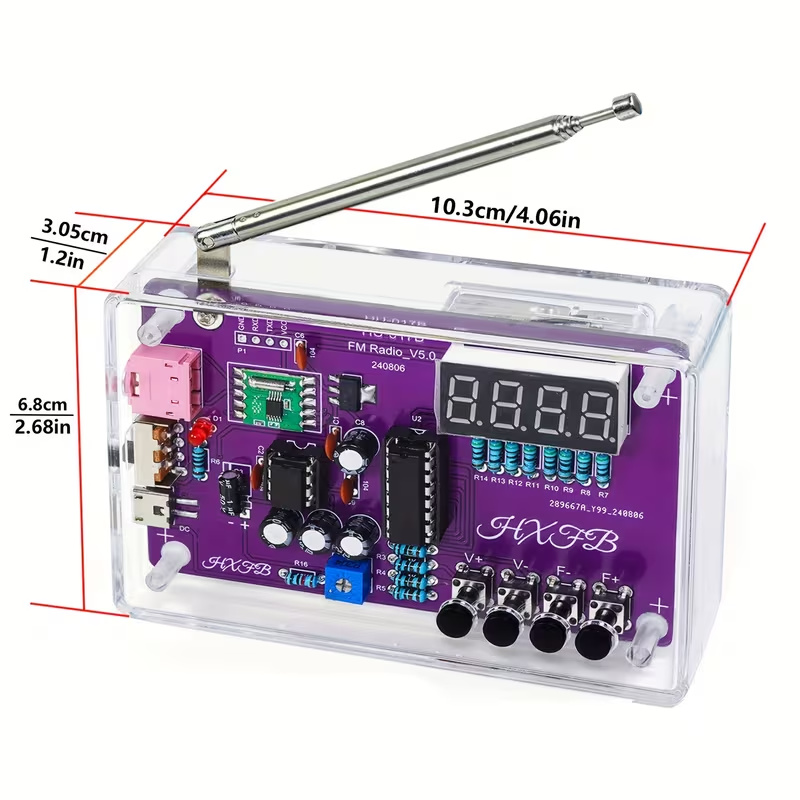
Soldering required. Check the supplied parts and board revision.
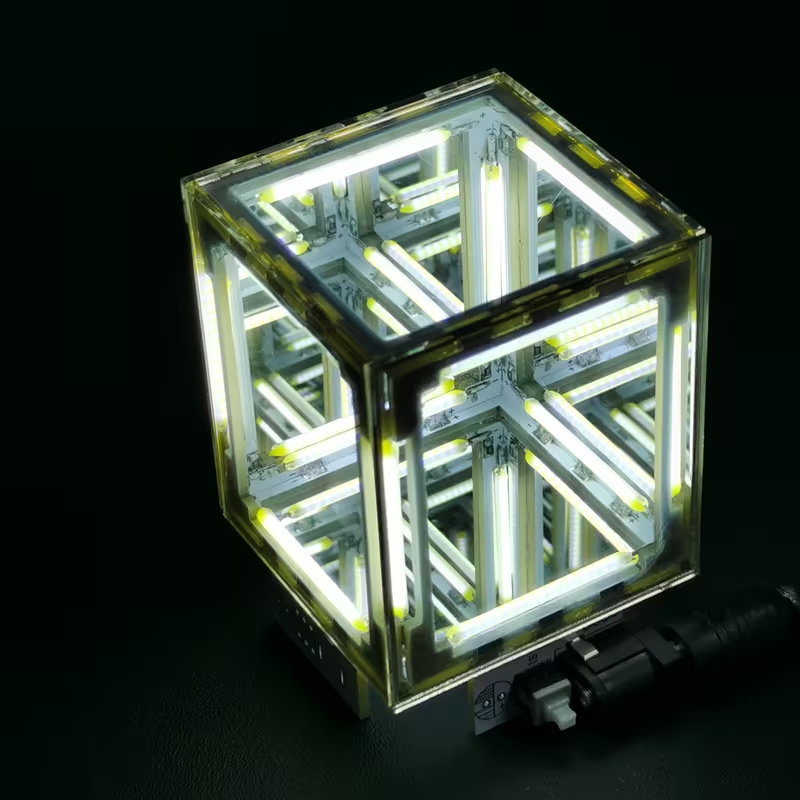
Listing specifies 5-volt direct current. Soldering required; battery and glue not included.
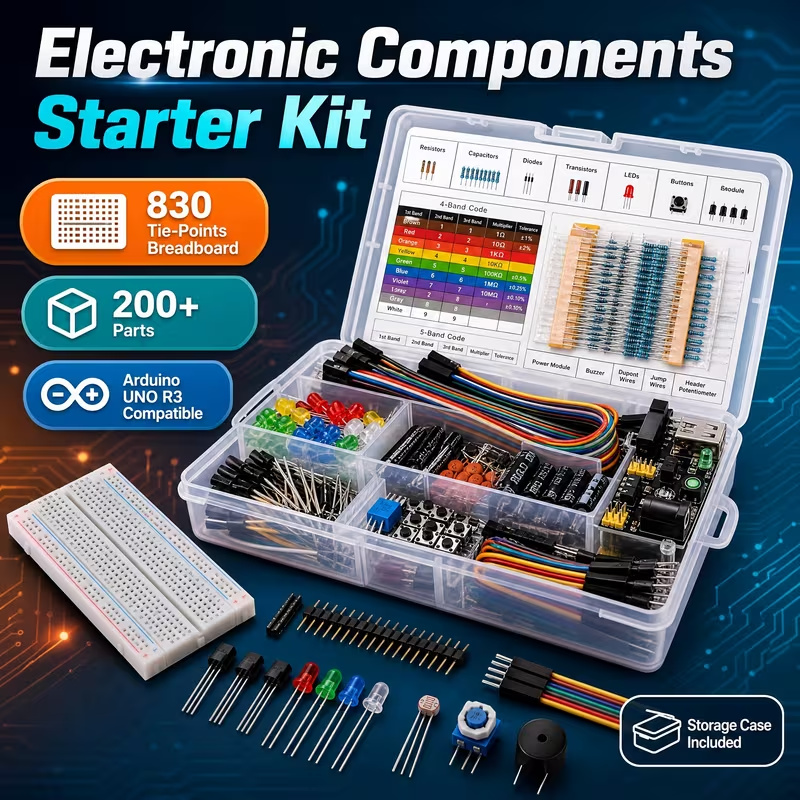
Breadboard, wires and assorted parts. Arduino controller board not included.
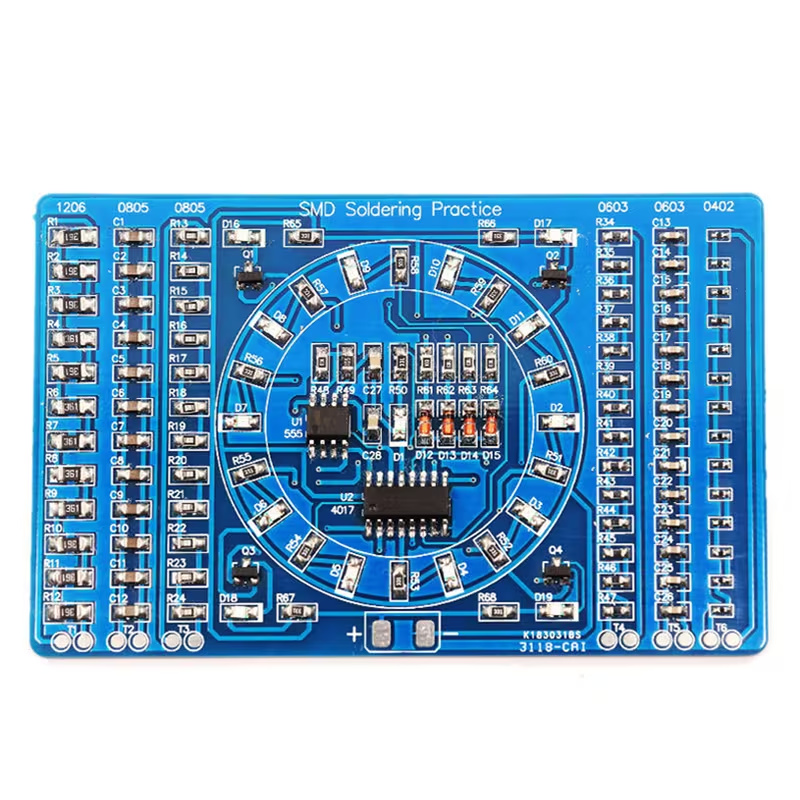
Surface-mount soldering practice. Battery and battery holder not included.
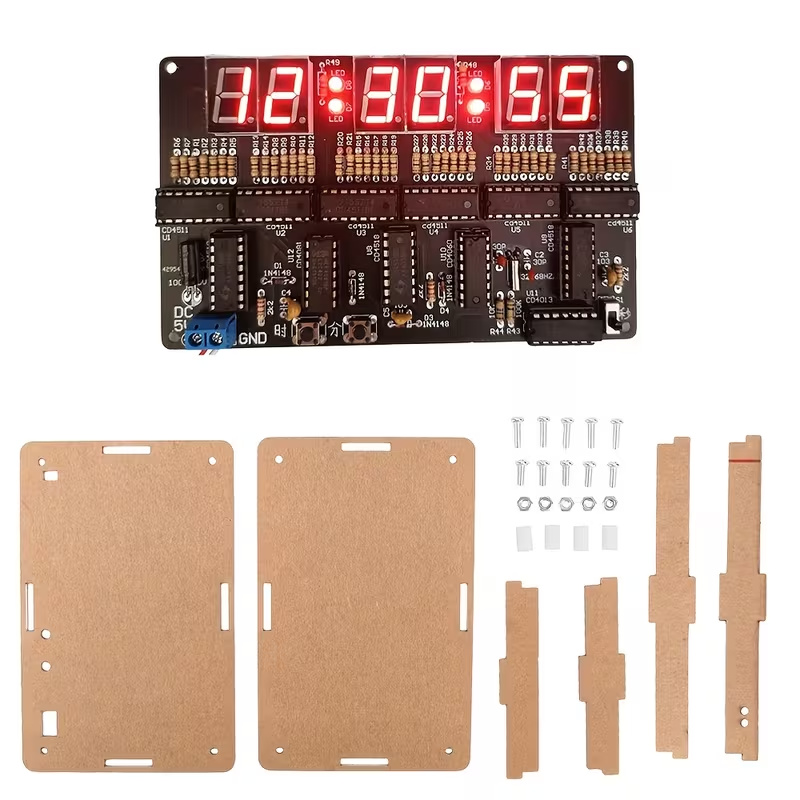
Clock-and-case project kit. Soldering required; check included parts and power requirements.
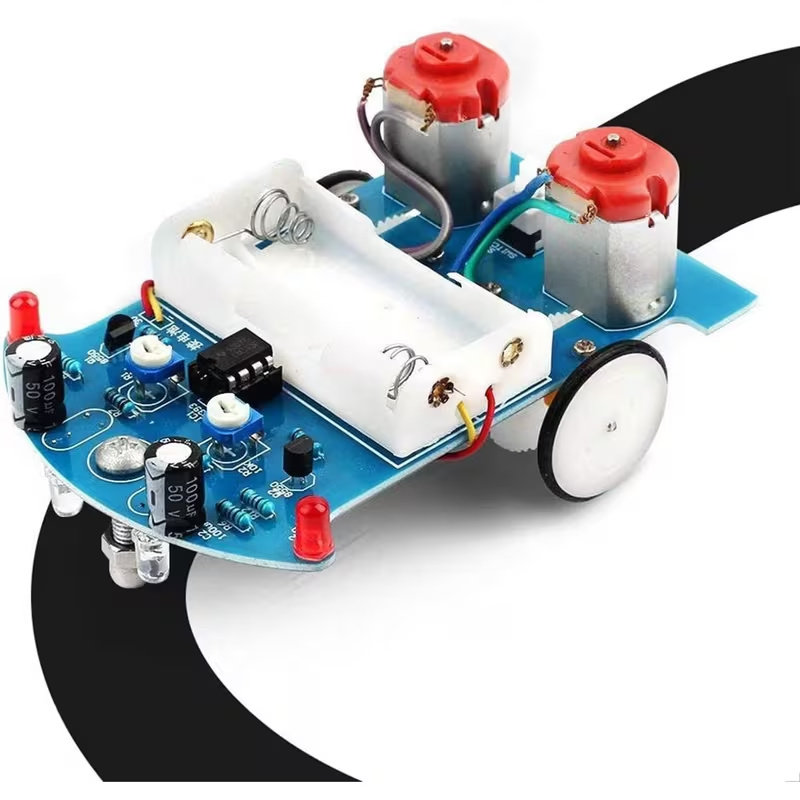
Soldering and assembly required. Check battery and track requirements before buying.
Tricky Circuit may earn a commission through these links. Product ideas have not been bench-tested by Tricky Circuit and are not verified lesson parts lists.
Read fresh BMP390 pressure with a complete Pico driver. Track a short-lived local reference and show why weather, heating and air models prevent an automatic exact height.
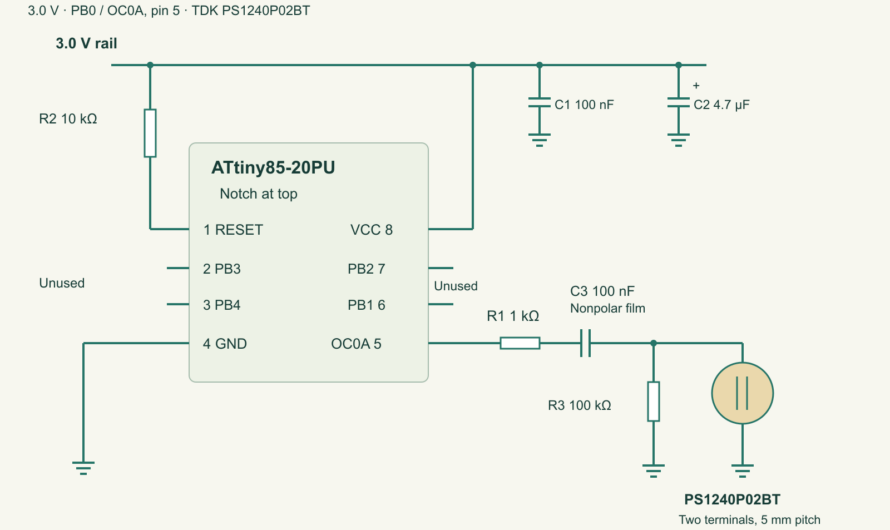
Use ATtiny85 hardware CTC to drive an exact passive piezo, calculate clock and rounding errors, bound pin current, and stop the output in a defined low state.
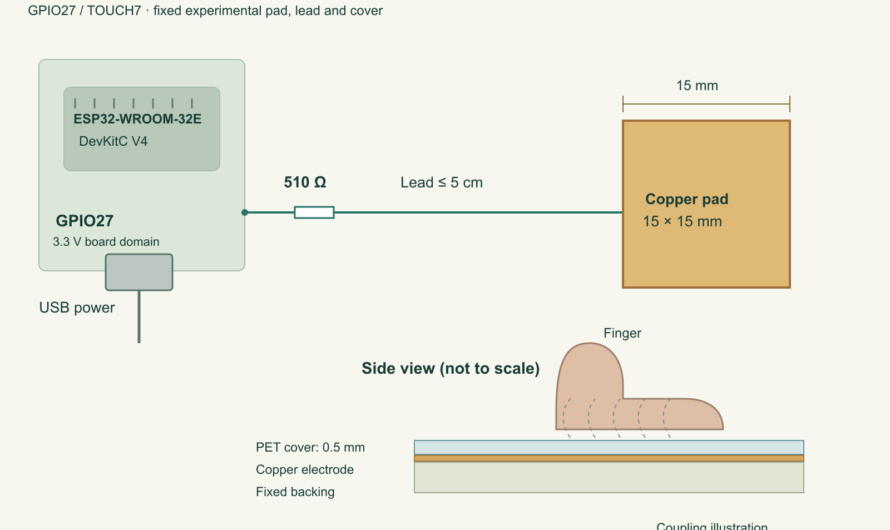
Build an ESP32 touch pad that freezes its baseline during touch candidates and a held touch. Full code separates slow drift, hysteresis and latched read faults.
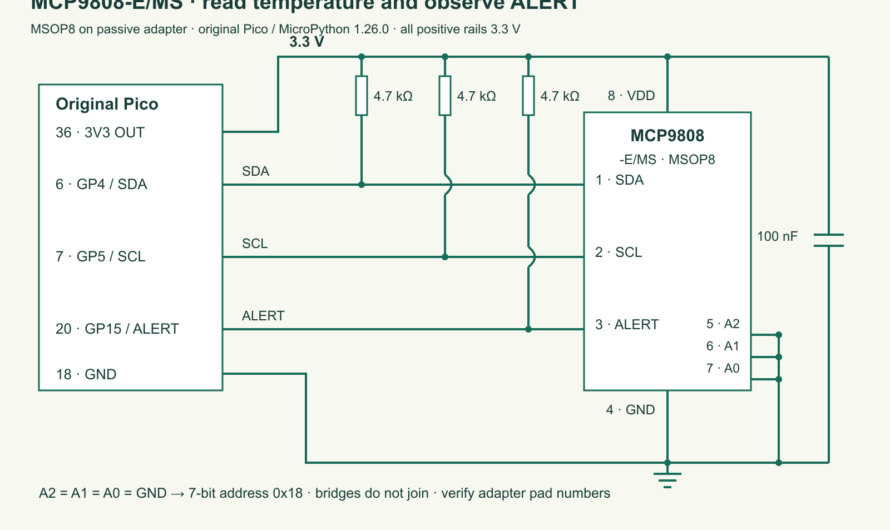
Compare MCP9808 window alarms, hysteresis and manual interrupt acknowledgement while reading temperature flags, CONFIG status and the physical ALERT wire separately.
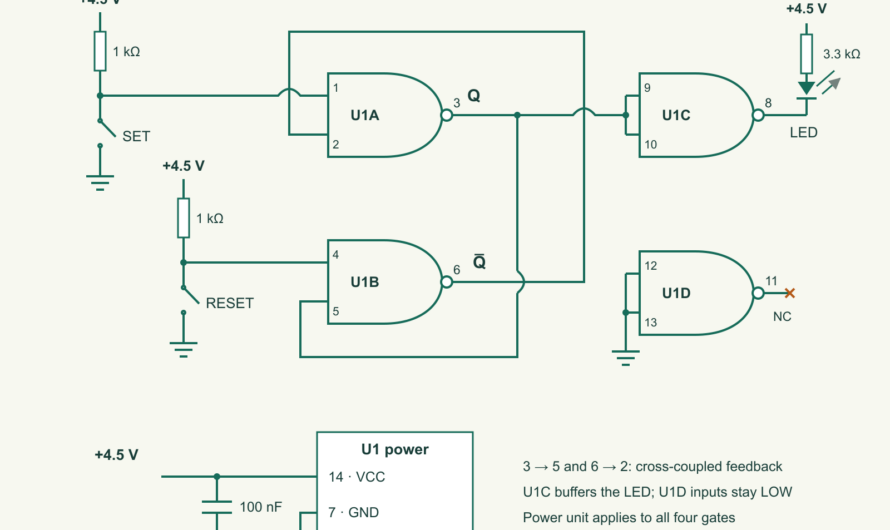
Build a NAND memory latch with exact SN74HC00N pins, then compare valid storage, both-low inputs, release order and unspecified power-up.
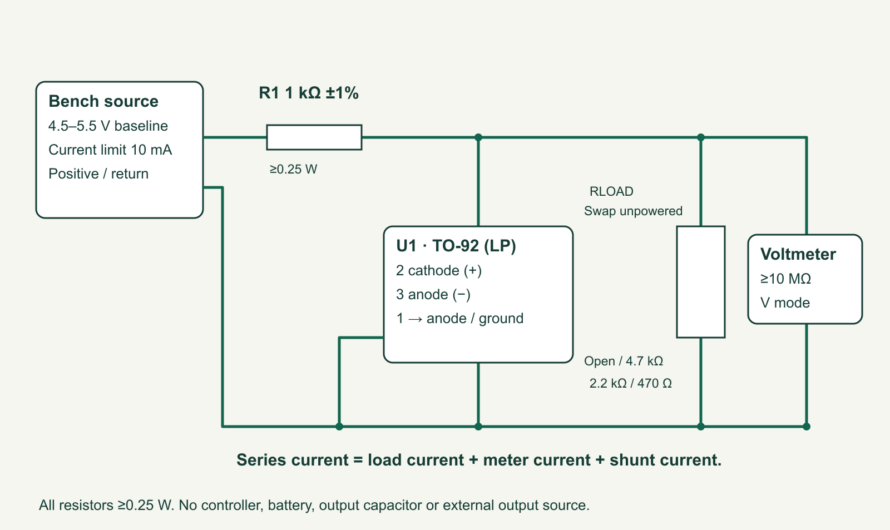
Build a 2.5 V LM4040 shunt-reference lab. Budget source, load and meter current; test headroom and explain why a plausible voltage can still be underbiased.
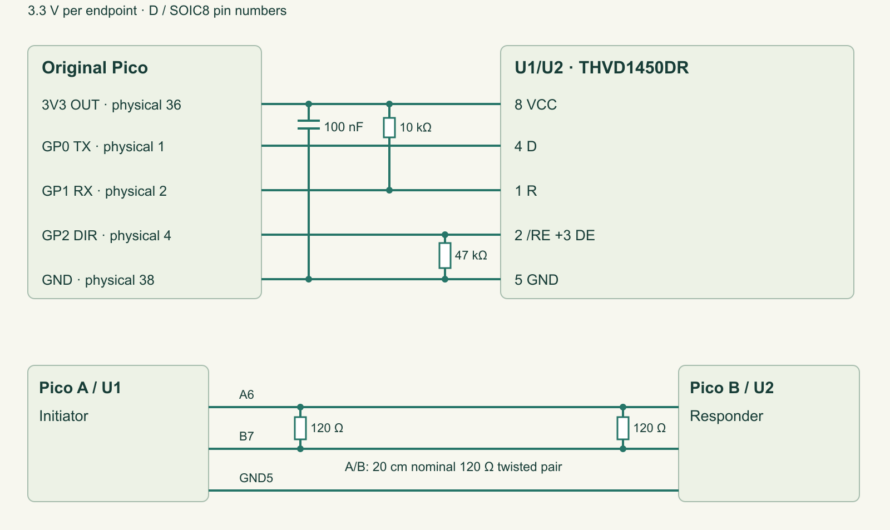
Build a short THVD1450/Pico link and separate UART queuing, transmit completion and a matching reply. Full code, termination calculations and direction-cleanup fault tests.
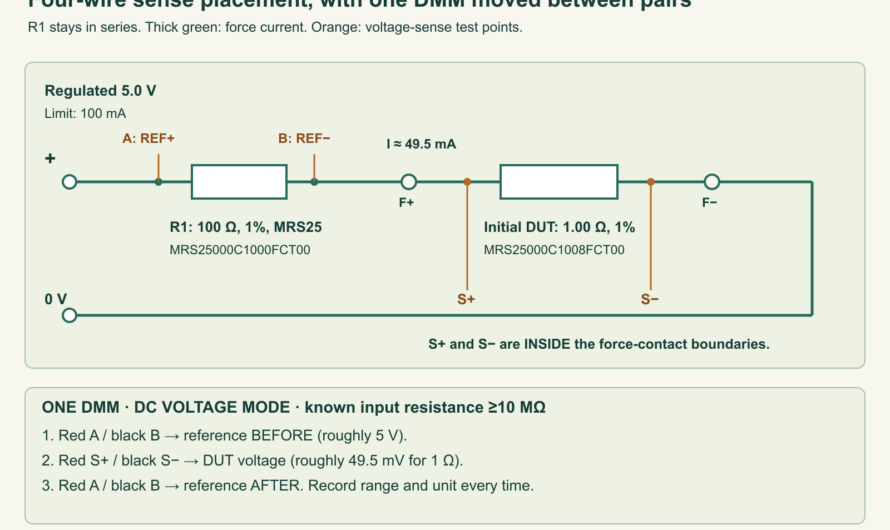
Use one voltmeter and a 100 ohm reference to explore four-wire resistance. Move sense points, bracket current drift and calculate honest conditional error bounds.
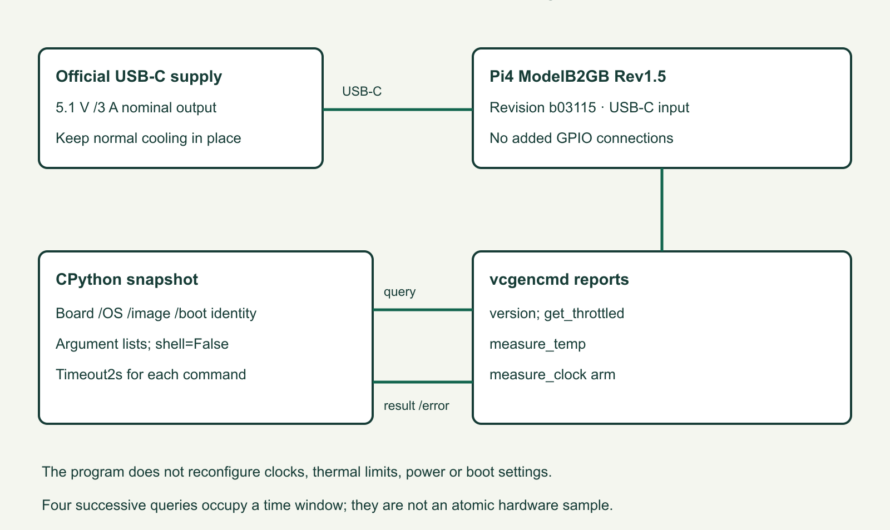
Decode Raspberry Pi4 current and historical health flags separately. Use a read-only Python snapshot that preserves unknown bits, command failures and firmware identity.
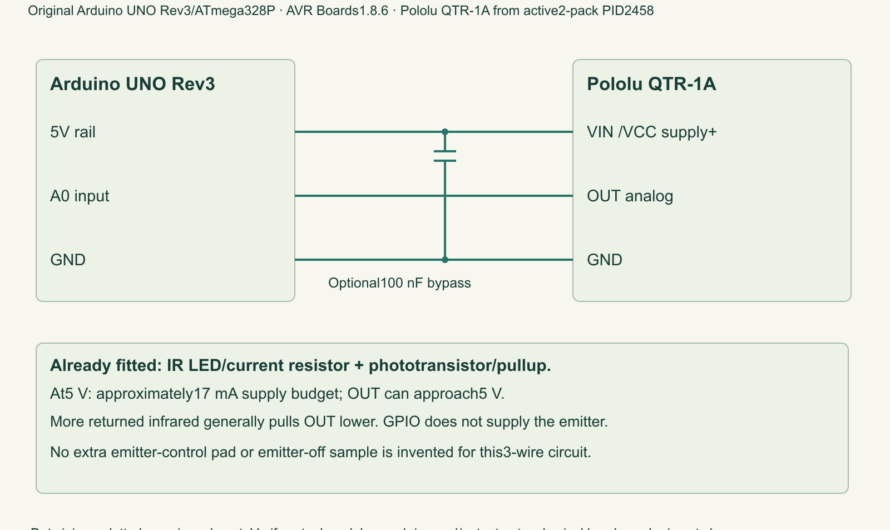
Test QTR-1A materials at3–6mm with full UNO code. Compare complete sample windows, reject weak calibration and bracket each reading with a reference before assigning a label.
Explore these do-it-yourself project kits. Check the selected option, included parts and instructions on each offer.
Tricky Circuit may earn a commission if you buy through these Temu affiliate links. These are product ideas; they have not been bench-tested by Tricky Circuit and are not verified lesson parts lists.
Supplier product photo
Soldering required. Check the supplied parts and board revision.
Supplier product photo
Listing specifies 5-volt direct current. Soldering required; battery and glue not included.
Supplier product photo
Breadboard, wires and assorted parts. Arduino controller board not included.
Supplier product photo
Surface-mount soldering practice. Battery and battery holder not included.
Supplier product photo
Clock-and-case project kit. Soldering required; check included parts and power requirements.
Supplier product photo
Soldering and assembly required. Check battery and track requirements before buying.