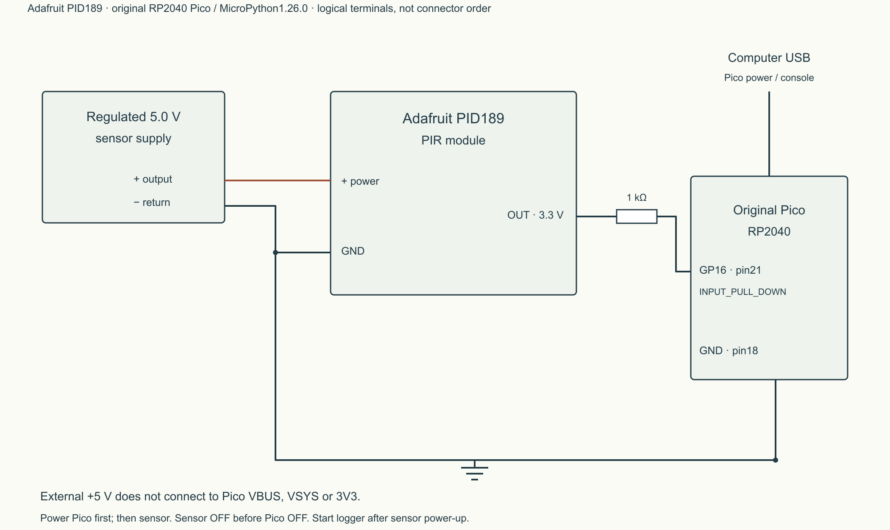
Pico PIR Experiment: Warm-up, Hold Time and Retriggering
Measure PIR output intervals with a Pico while separating startup, H/L retriggering and software qualification—and never turn pulses into a people count.
Unravel the Mystery of Electronics
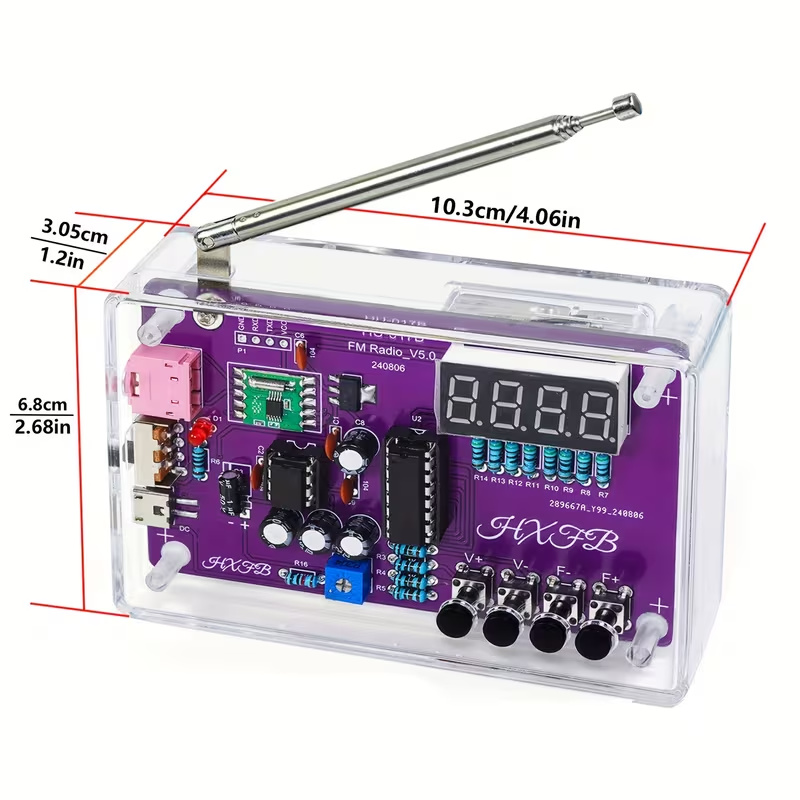
Soldering required. Check the supplied parts and board revision.
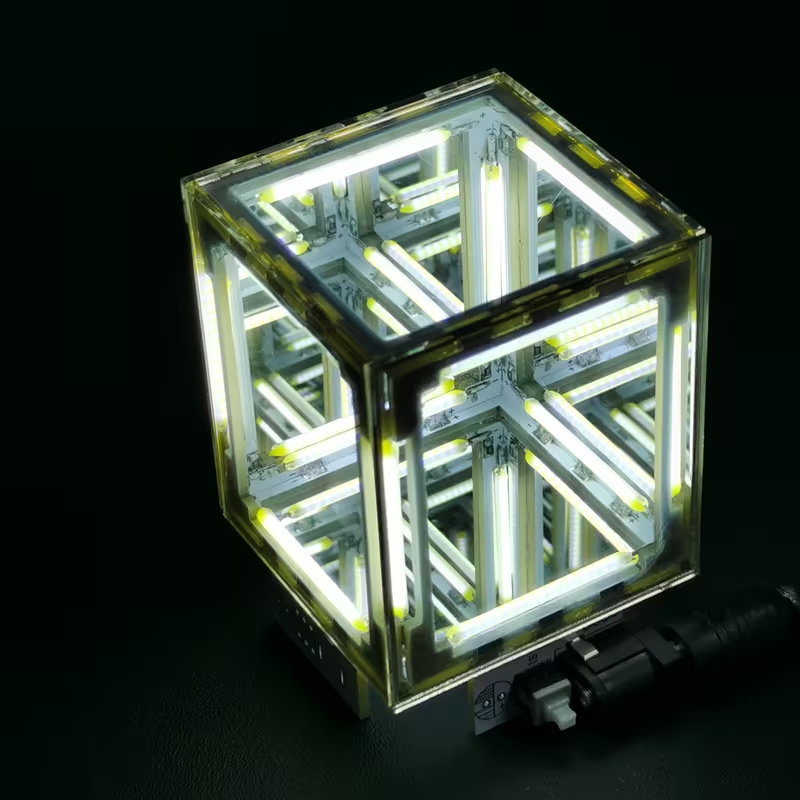
Listing specifies 5-volt direct current. Soldering required; battery and glue not included.
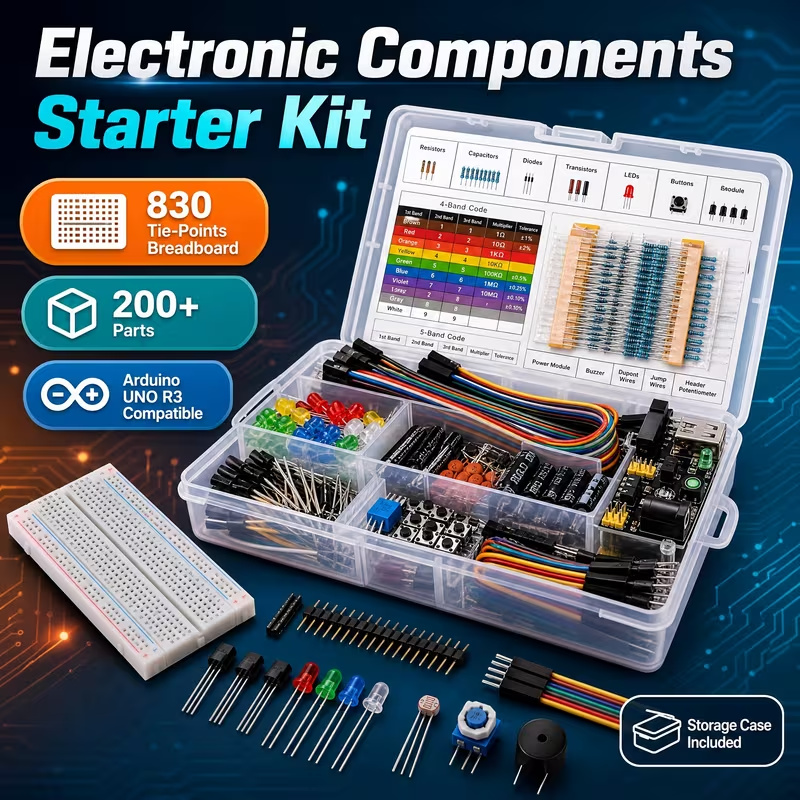
Breadboard, wires and assorted parts. Arduino controller board not included.
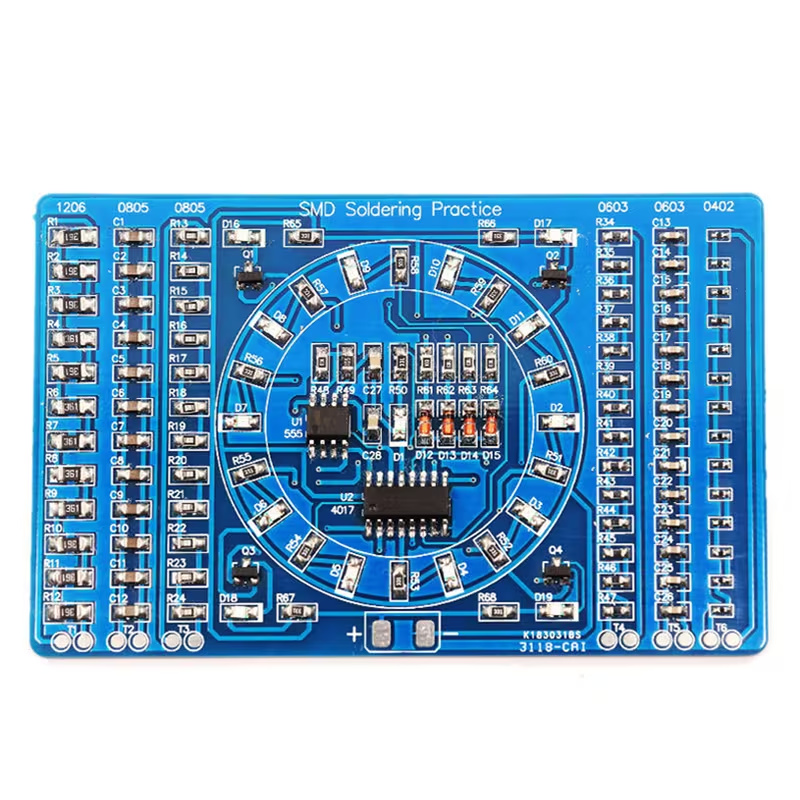
Surface-mount soldering practice. Battery and battery holder not included.
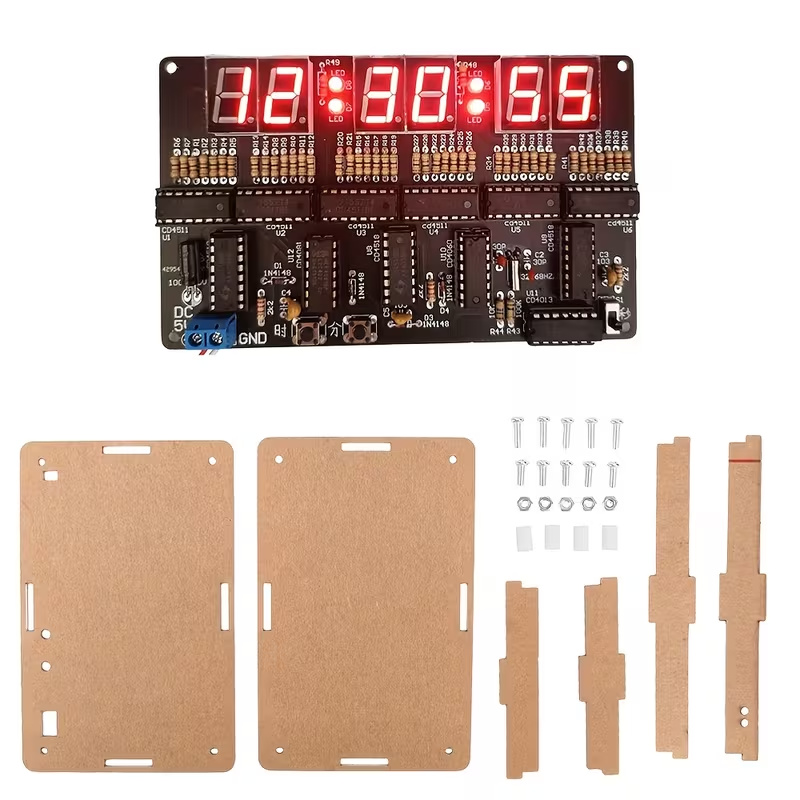
Clock-and-case project kit. Soldering required; check included parts and power requirements.
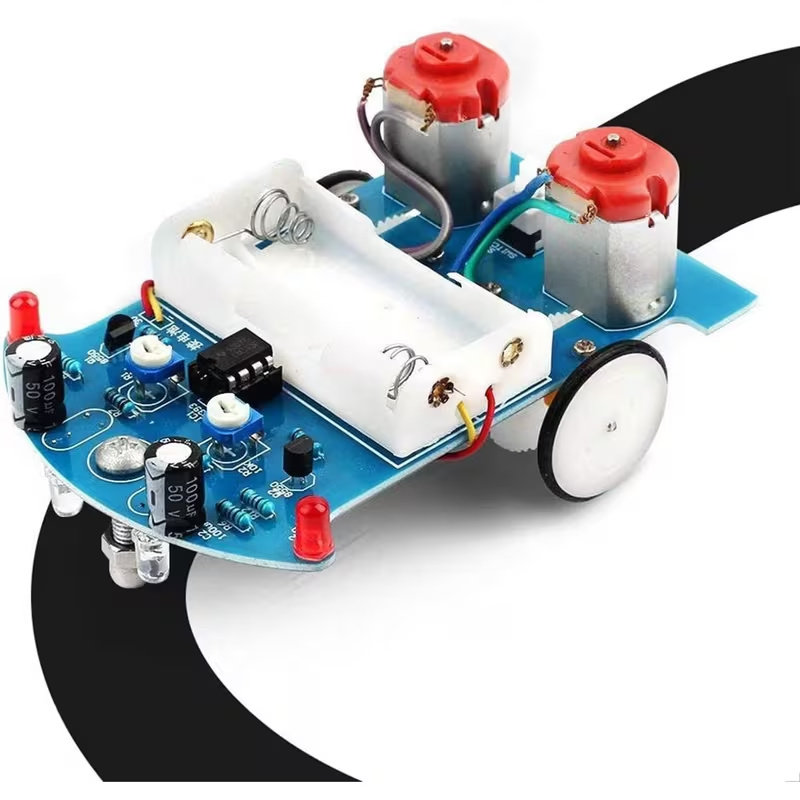
Soldering and assembly required. Check battery and track requirements before buying.
Tricky Circuit may earn a commission through these links. Product ideas have not been bench-tested by Tricky Circuit and are not verified lesson parts lists.
Measure PIR output intervals with a Pico while separating startup, H/L retriggering and software qualification—and never turn pulses into a people count.
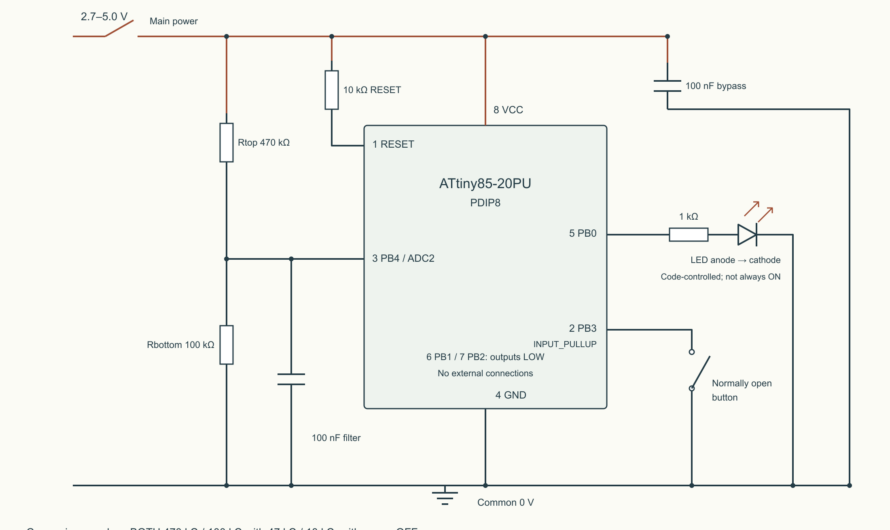
Compare two ATtiny85 battery dividers with the same ratio and tenfold different drain. Learn the VCC-reference trap, source impedance and per-unit calibration with full AVR C.
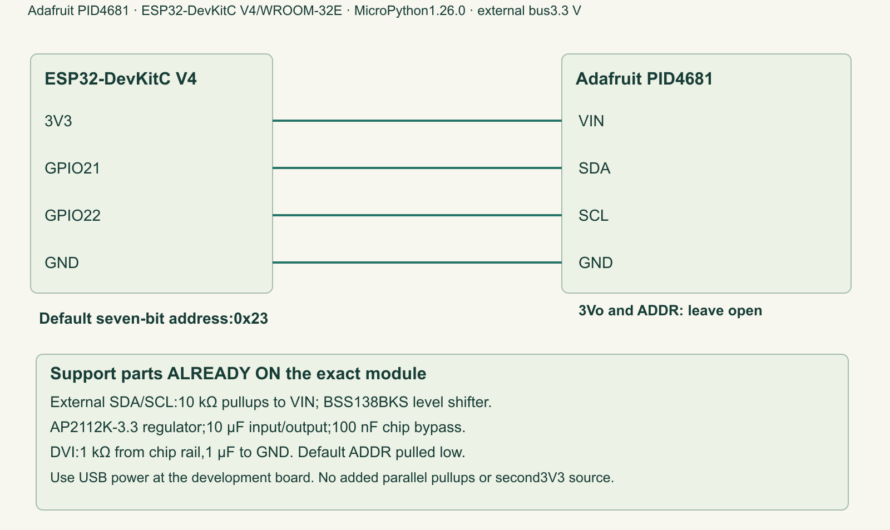
Test BH1750 placement with a fixed lamp and A–B–A trials. Full ESP32 code rejects clipping, bus faults and shifting baselines before comparing angles or a clear window.
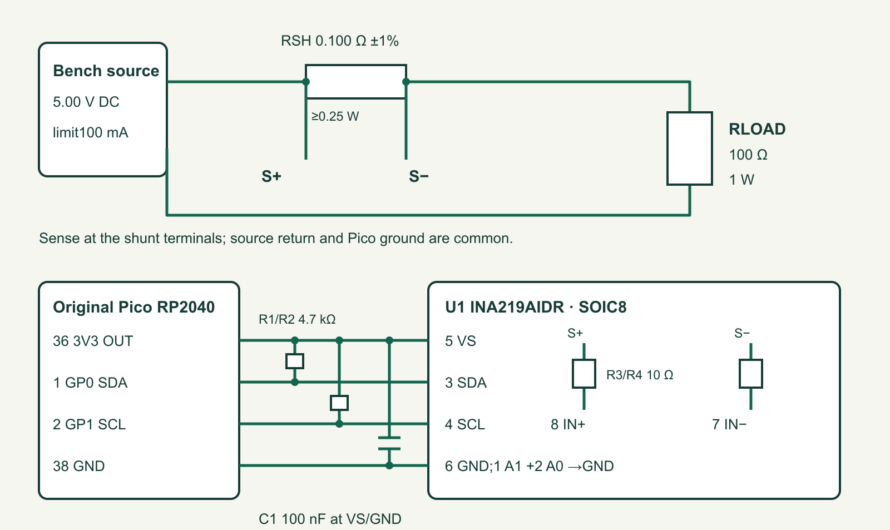
Build a calibration-aware INA219AIDR current monitor. Check raw shunt voltage, one-shot conversion readiness and reset faults before treating zero as a measurement.
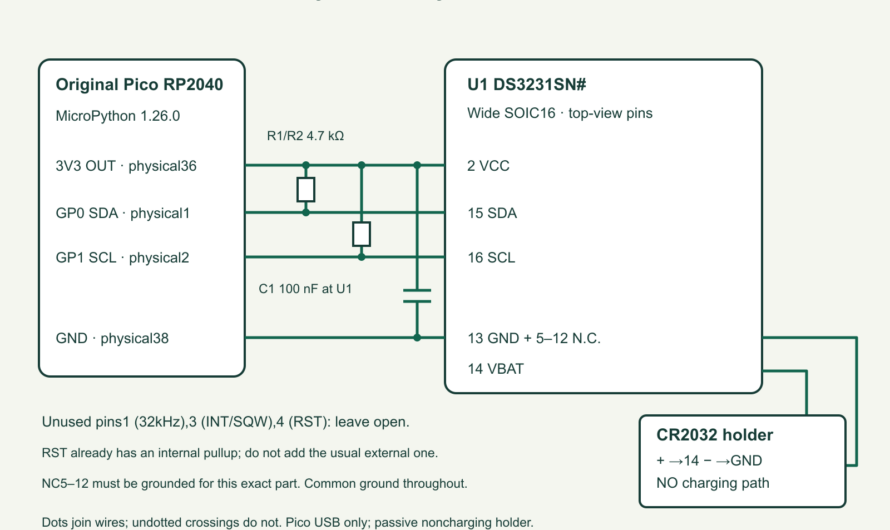
Build a DS3231SN# validity lab. Decode real calendar bytes, preserve alarm flags and separate oscillator history from a time source you actually recorded.
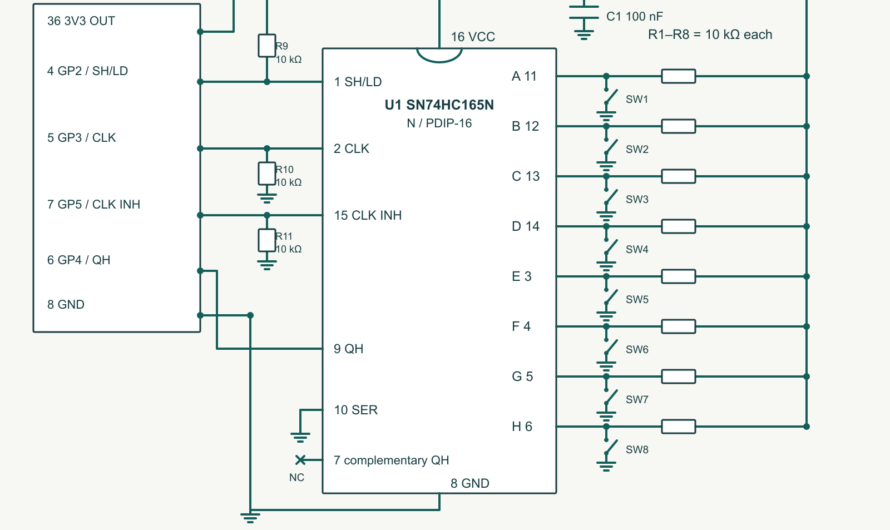
Capture eight button states with a 3.3 V SN74HC165N, read H before the first clock, and expose the extra-shift trap on CLK INH.
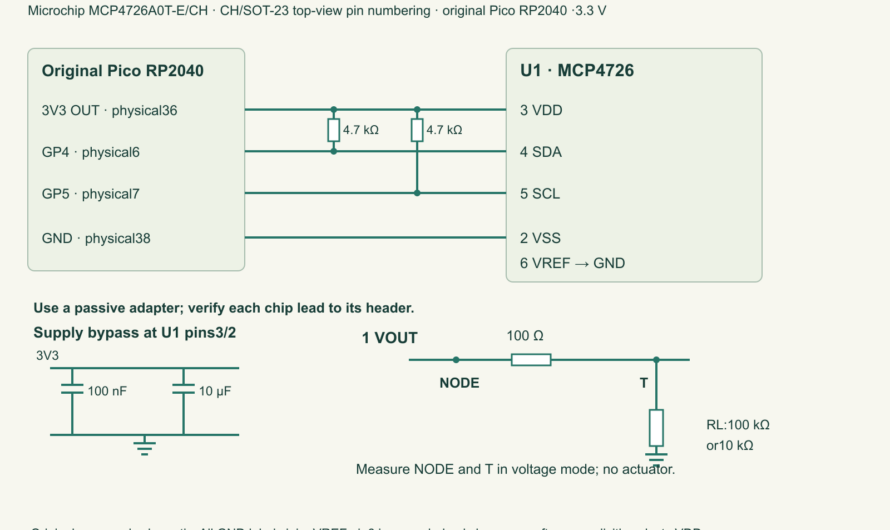
Generate three MCP4726 voltage steps at3.3 V. Compare DAC node and loaded terminal, calculate reference and resistor effects, and keep bus acknowledgements separate from measurements.
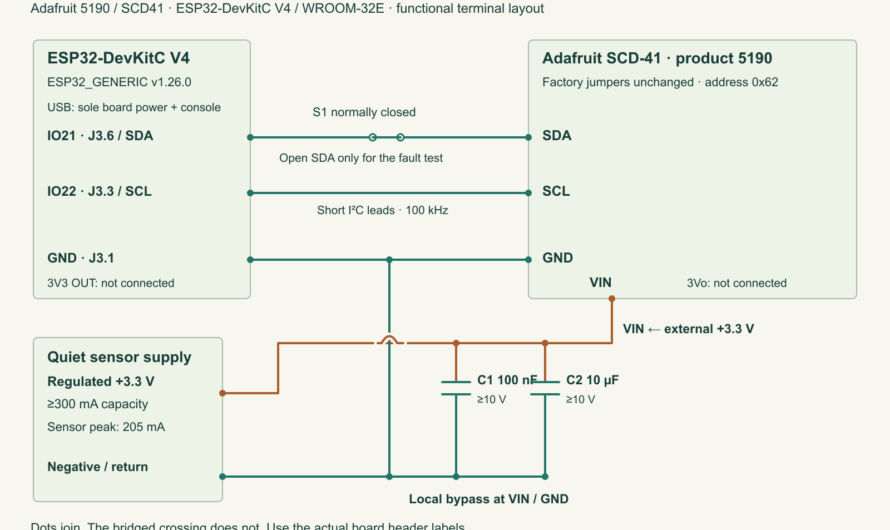
Build an ESP32/SCD41 CO₂ monitor that separates startup, warm-up, fresh results, stale data and fault recovery. Includes full MicroPython code and original diagrams.
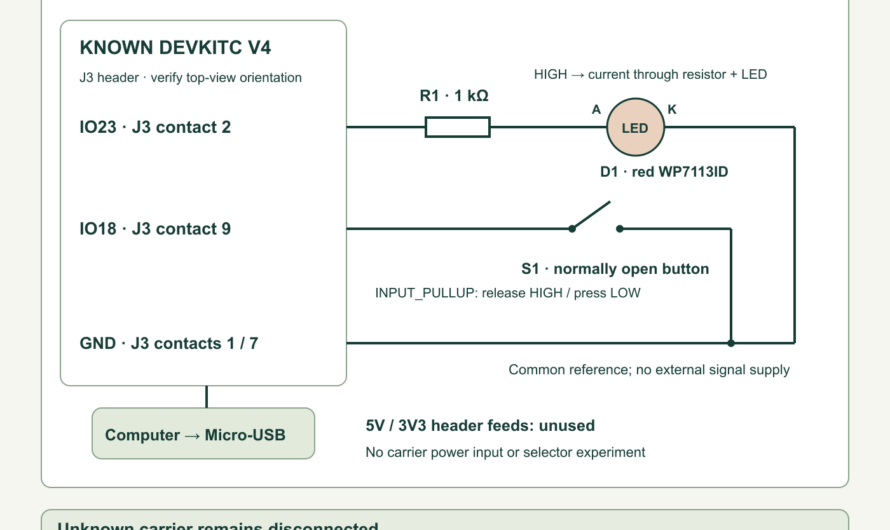
Identify an ESP32 terminal carrier before powering it. Map an unpowered board, then run a complete button-and-LED baseline on a documented ESP32-DevKitC V4.
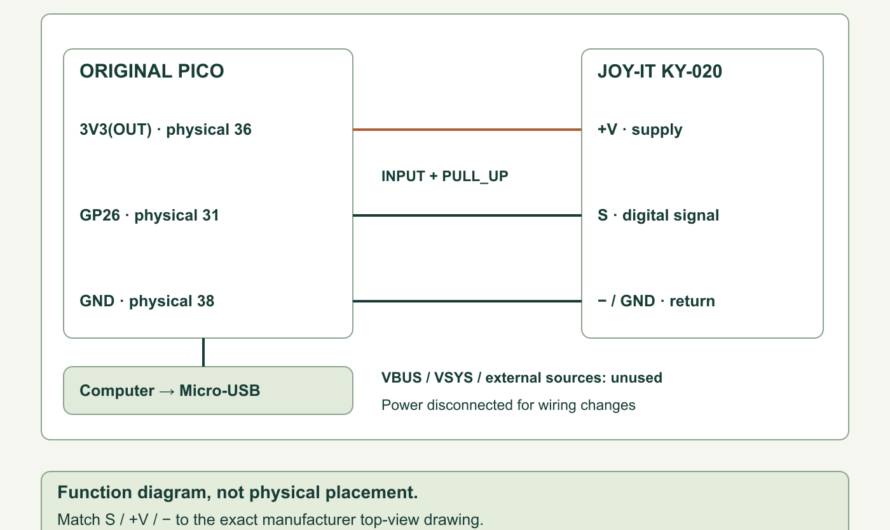
Build a Joy-IT KY-020 and Pico event logger. Separate startup, contact chatter, settled transitions, missed short pulses and sampling gaps with complete MicroPython code.
Explore these do-it-yourself project kits. Check the selected option, included parts and instructions on each offer.
Tricky Circuit may earn a commission if you buy through these Temu affiliate links. These are product ideas; they have not been bench-tested by Tricky Circuit and are not verified lesson parts lists.
Supplier product photo
Soldering required. Check the supplied parts and board revision.
Supplier product photo
Listing specifies 5-volt direct current. Soldering required; battery and glue not included.
Supplier product photo
Breadboard, wires and assorted parts. Arduino controller board not included.
Supplier product photo
Surface-mount soldering practice. Battery and battery holder not included.
Supplier product photo
Clock-and-case project kit. Soldering required; check included parts and power requirements.
Supplier product photo
Soldering and assembly required. Check battery and track requirements before buying.