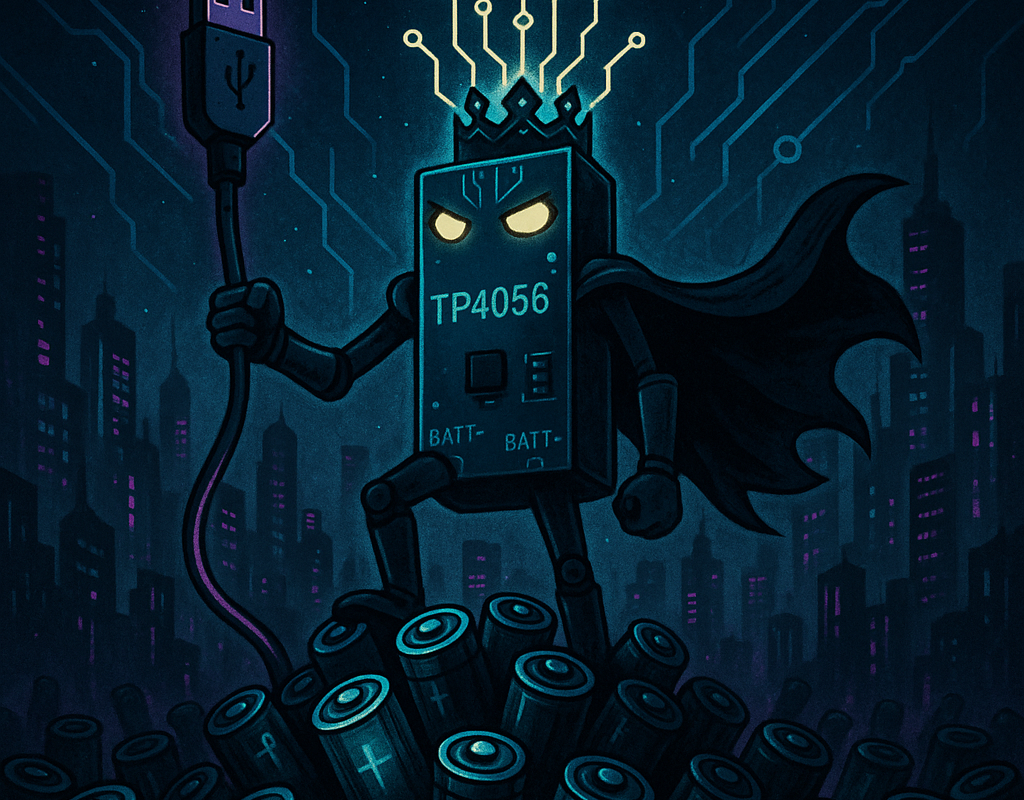
“Everything you need to know about charging lithium batteries without accidentally burning down your house.”
🧠 What is TP4056?
TP4056 is a popular linear battery charger IC designed specifically for single-cell Li-Ion and Li-Polymer batteries.
It charges the cell with constant current (CC) followed by constant voltage (CV), ensuring safe and efficient charging.
⚡ Key Features
- 🛜 Input voltage: 4V – 8V (typically powered by USB 5V)
- ⚡ Charging current: up to 1A (programmable)
- 🔋 Full-charge voltage: 4.2V
- 📈 Charging method: Constant Current / Constant Voltage
- 🧠 Built-in safety:
- Over-temperature protection
- Under-voltage lockout
- Automatic recharge
- 🚦 Charging status outputs (LED indicators)
📦 Typical Applications
- USB battery chargers (DIY power banks)
- Wearable electronics
- Bluetooth devices
- Arduino, ESP32 portable projects
- Emergency LED lamps
📏 Standard Pinout
| Pin | Name | Function |
|---|---|---|
| 1 | TEMP | Temperature sense (usually tied to GND) |
| 2 | PROG | Program charging current via resistor |
| 3 | GND | Ground |
| 4 | VCC | Input voltage (4-8V, usually 5V USB) |
| 5 | BAT | Battery connection |
| 6 | STDBY | Status: Charge complete (LED) |
| 7 | CHRG | Status: Charging (LED) |
| 8 | CE | Chip Enable (active low, usually tied low) |
🧰 How to Set the Charging Current
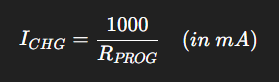
You define the current using a resistor connected to the PROG pin.
Formula:
| Desired Current | Resistor Value (Rprog) |
|---|---|
| 1000mA | 1kΩ |
| 500mA | 2kΩ |
| 100mA | 10kΩ |
🛡️ About TP4056 Modules with Protection
Some TP4056 modules come with additional protection chips like:
- DW01A: battery protection IC
- FS8205A: dual MOSFET for cut-off control
These protect against:
- Overcharge
- Over-discharge
- Short circuit
- Reverse polarity
Modules with protection usually have 6 terminals instead of 4:
- IN+, IN-, B+, B-, OUT+, OUT-
Always connect the load across OUT+ and OUT-, not B+ and B-.
🧪 Example Circuit (Basic Setup)
For a simple USB Li-Ion charger without external load:
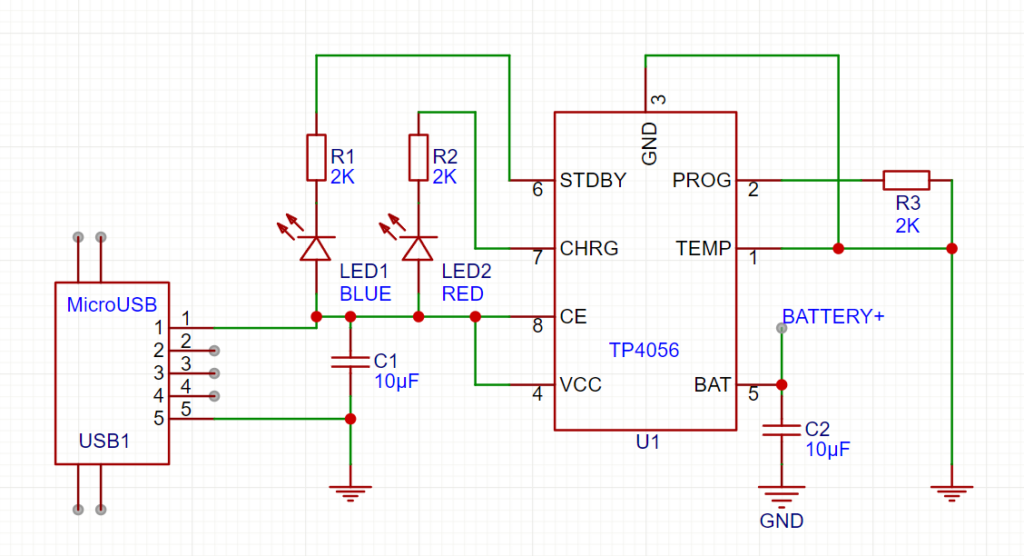
No magic. Just wire properly and don’t burn the house.
🛠️ Advanced Setup: Full-Protected Power Module
Components:
- TP4056 charger IC
- DW01A + FS8205A protection circuit
- USB or DC input
- Load connected to OUT+, OUT-
- Bypass capacitors (10µF at input/output)
- Optional PTC resettable fuse for USB input (500mA typical)
⚠️ Common Mistakes to Avoid
| Mistake | Why it’s a problem |
|---|---|
| Connecting load directly to B+ | Bypasses protection, risks overdischarge |
| No bypass capacitors | Causes instability or resets |
| Using low-quality USB power | Can cause undervoltage, slow or failed charge |
| Using too high Rprog value | Leads to very slow charging or fake “charging complete” detection |
| Overheating the chip (>100°C) | TP4056 may go into thermal shutdown (or die) |
🚀 Pro Tips
- Always add a heatsink pad under the TP4056 if charging >500mA.
- Use a 2kΩ Rprog to charge gently at ~500mA — saves battery life.
- Prefer modules with a real DW01+FS8205 combo for serious projects.
- Always triple-check wiring before connecting batteries — Li-Ion cells are not forgiving.
🎯 Conclusion
TP4056 is cheap, versatile, and robust — if you respect its limits.
For small Li-Ion projects, it’s hard to beat its simplicity and performance.
🔋
It’s not just a charger. It’s your battery’s best friend.
Unless you mess up — then it’s your firestarter. 😄